The embroidery machine needle broke and chewed up my shirt. Did you ever have a needle break in the middle of your embroidery and have it chew up your garment? This can happen when your turn around to start hooping another garment and do not monitor the machine. 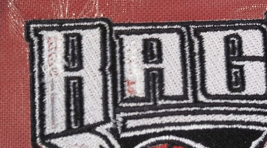 While Betty, the embroidery machine operator, an excellent operator, was on the other end of the 15 head machine the needle broke on head no. 1 and it chewed up the center of 2 letters. It was sewing a narrow silver line in the center part of the letter and that section was totally chewed up! Here is a picture of the garment.
At first Betty panicked but when I took a look at it, I knew that I could fix it. Sometimes it is not worth your time to go through and fix something, but it all depends on the value of the garment and whether or not you can replace the garment. This happened to be a very expensive golf shirt that a customer had brought into the shop. It was one of an order of 24 pieces and this one needed to be fixed!
When something like this happens, you must leave it in the hoop. If you unhoop it, your chances of getting it all lined up perfect for this type of fix is not very good. So first rule-DO NOT UNHOOP!
I turned the hooped garment over and placed it upside down on my ripping and pressed a scrap piece of no show backing on it to help hold the shirt together that was chewed up.
Here is a picture of the backside of the garment with the piece of pressed backing on it.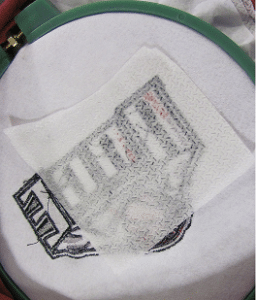
I brought up the original stitch file of the design, unfortunately, I did not have an outline file or my .pxf file which is the native original outline file for my software, because the design was brought in by the customer. Here is a picture of the original .dst file.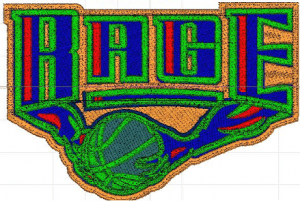 The colors show wrong, but that is the nature of a .dst file. You can see those narrow red lines inside of the letters. This is what was being embroidered in silver when the needle broke.
I digitized a same sized area from the edge of the black outline( the green outline on the .dst file pictured) on each side of that section of the letter and then copied the red line area from the .dst file onto that filled area that I created. I used the same complex fill type stitch pattern inside of the white area.
I found out where the start and stop section was in the center of the design and I put in a command so that the new section that I was creating would also start and stop in that same spot. I deleted all of the rest of the design, made sure my fixed design was also going to start and stop in the same place as the original design and then saved it as the design name fix. Here is a picture of that 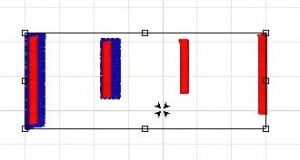 finished design fix from my software. You can see where it was starting and stopping from the cross hairs are and the star in the design. Betty put the hooped shirt back into the machine and taped a new piece of topping on the top.
She had taken out the shirt when she noticed the needle break, turned off that head and finished the run for the rest of the shirts. Now the machine was back into the same start position and she was ready for the fix. She programmed the new fixed design into the machine, programmed in the colors that she needed and then started the machine. It was lined up perfectly and sewed out in the perfect spot.
You must remember to always put the hooped garment back into the same head that you removed it from when you are using a multi-head machine. Not all of the heads are in the exact same location and this is very important!
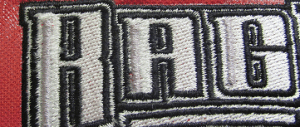 This is an enlarged photo but you can see the end result! It was a perfect match and the customer would never know that his garment got chewed up by the embroidery machine!
