Basic Embroidery Design Techniques!
Inside of Basic Embroidery Design Techniques, you have access to many programs teaching you Basic Embroidery Design Techniques. Each one of these programs will help you increase the quality of your designs and show you many shortcuts and editing techniques. These are all very important skills that you must master before you start digitizing. Having these skills will shorten your learning curve and decrease the amount of time that it takes for you to learn how to create high-quality designs.
These programs are also all available inside of the video training membership site from the Gold Level on up, but they can be purchased on an individual level if you prefer not to pay the membership fee!
Click on the product link below to the Information page about each product.
How To Embroider Small Letters – Small lettering can be an issue for many people especially when they are first starting out with their embroidery business. I show you how to create small lettering that will sew out great on any type of fabric. I even give you the right settings to use for your lettering designs. I use the Pulse software but these same settings will work in any embroidery design software. The names of your tools may not be the same as mine, but your underlay, pull comp, and density settings will be present in your embroidery software.
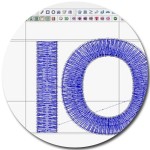 Understanding Embroidery Push & Pull Compensation– Every stitch type and segment of our design needs underlay stitching and push or pull compensation added for high quality. Underlay is your foundation for your embroidery and it is very important to use the right type of underlay stitching in order to produce high-quality embroidery. Understanding Push & Pull Compensation is extremely important and is one of the basics of every design. I teach you exactly what your settings are that you should apply for your Pull Compensation and show you the difference in your push and pull compensation and I also teach you what settings to use for the different types of fabrics.