by The Embroidery Coach | | Embroidery Education
Here is a question that I received from one of my students. She needs some help creating outlines on Small Lettering the easy way! I thought that I would share it with my readers as this is a common problem.
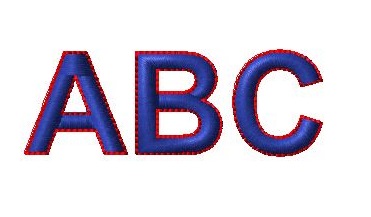
Hi Joyce, hope you can give me some advice on lettering. Everybody wants OUTLINES. and I find them to be very problematic. I have seen them done with smaller lettering successfully, though so I don’t want to give up. I’m doing a 13mm lettering and every type of outline I use looks like a dotted line! I don’t want to do satin outline because I think it may be too heavy. Any advice?
Vicki, Creating an outline on a small letter can sometimes be very problematic; however, it is doable! Creating a satin stitch around a letter that is only one-half inch is very difficult. You will usually lose most of the inside area of your letter.
The run stitch outline looks good if you are using a dark colored thread. If you are using a light colored thread it looks terrible, at least that is my opinion. I have found that by digitizing a run stitch and going around the letter 2 times will make it look slightly better. Also, use a small stitch length such as 1.6 or 1.8 millimeters. Do not use the 2 ply as it will start and stop in the same place and you do not always have control over the start and stop point. It all depends on your software.
When you are creating outlines on small lettering the easy way, the best method is to digitize a single run stitch around your letter and then duplicate it. You can control the start and stop point if you are using this method. Another tip is to create the inside part of 2 or 3 letters at a time if you are doing a line of lettering. Then go back and create the outside part of these same 2 or 3 letters. Make sure that you put a lock at the beginning and at the end of this run segment. I always use line locks for my run stitches and connect each one of these letters. Do not lock and trim each letter individually, you may have many thread breaks or the thread may come out of the needle when you are starting up the embroidery machine. This is my favorite method of creating outlines on small lettering the easy way!
Vicki, I hope that helps you a bit!

by The Embroidery Coach | | Embroidery Education
In our last post, we talked about how to find a good digitizer and the qualities that you should look for in a good digitizer. Today we are going to expand on that and talk about what you can expect to pay for embroidery digitizing charges.
There is a huge range when it comes to pricing for digitizing and different approaches to the way that they price their digitizing. Some digitizers charge by the stitch count only. The range for most good digitizers is from $7.00 to $20.00 per thousand stitches. You may even find a good one that will charge less than the $7.00 per thousand. Sometimes they charge by how long it takes and sometimes it is by the complexity of the design.
There are even good digitizers that will give you a choice and will create designs based on a scale. If you want a lot of detail it will cost you more than if you want less detail. If you want color blending this is an additional charge on top of the stitch count. If you find someone that is charging less, then you had better try them out on a design that is for a customer that would not complain if it is not the kind of quality that you envision. If the price is low, I would truly beware.
This brings me to the subject of going overseas for your designs. Yes, their designs are very inexpensive; but can you communicate with this person or is it a company that employs a lot of digitizers? You have no control over who you are going to get. Sometimes the designs are OK and sometimes they are horrible and you cannot specify who you want to digitize your design. This can also be true in this country if you are dealing with a large company. They will send your design to the next person that is available. Sometimes they even contract them out to other companies and maybe overseas. In this case, you can expect to pay a lot less for embroidery digitizing charges.
I am not saying that all digitizers in other countries are not good digitizers. I have found some very good ones, but you have to be very careful.
Embroidery Digitizer Must Sew Out Designs
Make sure that your digitizer sews out the designs before sending them to you. Many digitizers with such a low fee do not sew out the designs before sending them to you. Many of this type do not even own an embroidery machine. If you have a design that you have purchased for a low price and it has a lot of issues with it, it will cost you money in the end. It will drive up your production time so far that it will cost you money to do the job.
You want to make sure that you are working with someone that will give you a trouble-free design and you can make money on their work. This is truly one area that you do not want to skimp on in your embroidery business! This is one area where you get what you pay for. Don’t forget you are going to charge the customer for the digitizing fee. This is not a charge that you absorb in any way shape or form!
Embroidery digitizing charge are basically all over the board, you just have to shop around for a good one. Send the same design to several different digitizers and see who does the best job.
Click here for more information on what to charge for your embroidery and digitizing fees. It is very important that you charge for your setups and your digitizing. DO NOT absorb these costs. It will eat up all of your profits!