“Are You Taking The Time To Build Great Relationships With Your Customers?”

“Are You Taking The Time To Build Great Relationships With Your Customers?”

Building great relationships with your customers is one of the most important duties that we have as business owners and this is something that does not have to cost a lot of money. There are three ways of building great relationships with your customers and prospects, relationships that will help you build up a base of loyal repeat customers.

  • Personally connecting with your current customers
  • Email Marketing
  • Make sure you are offering Excellent Customer Service!

Many times it is the little unexpected things that we do that mean the most and keep that customer coming back to our business over and over!

A handwritten thank you note when you have done a large job for a customer, thanking him for his business and telling him how much you appreciate the fact that he trusted you with his order! Another time to send a thank you note is when you meet someone new at a networking meeting.

These are both great strategies in showing your appreciation and building a new relationship or improving a relationship that you want to see grow even more.

Connect With Your Customers To Build Great Relationships!

The best way to start building great relationships with your customers is to connect with each one of your current and lost customers. Start out by making 3 lists.

  • Current High Volume Customers
  • Current Lower Volume But Repeat Customers
  • Former or Lost Customers

Create some scripts that will make it easier for you to talk to people. I have found that having the scripts in front of me, it just made it easier as I was talking to them and I did not forget anything. You can also print out a script for each customer and fill in the blanks as you are talking to them. This was always my favorite way of working with my customers on the phone. I still do this today. Keeping notes makes it a lot easier to recall what they said for future reference.

Call each one of your customers- Start with your current high-volume customers – Ask them questions such as:

What is it that you like about our products or services? In your opinion, what it is that I can do to improve my company or service to you? Do you have a particular time of year that works best for you that we could sit down and plan out some promotions for you?”

If it is a customer that you are no longer working with, you will ask them different questions such as:

“I know that you are no longer using us as your supplier for your gift items and promotional products. Is there a way that we can change that? If you don’t mind my asking, what was it that I did or did not do that made you decide to go elsewhere?”

As you are talking to them, tell them about your referral program and how it works.

After you finish talking to each customer, fill out a thank you note, thanking them for taking the time to talk to you, and insert some business cards. Make sure that you tell them to sign the back of the business cards before they hand them out to their family, friends, and acquaintances. This handwritten Thank You note will go a long way in helping to build your new customer relationship with that customer and it will be something that they will not forget!

Getting your customer’s opinions and feedback is extremely valuable to your business and makes it a lot easier to plan your strategies as to how to work with them and provide them with the type of services and products that they will be anxious to purchase from you. They really do appreciate you asking them what they need. This can be the beginning of a long working relationship with each one of your customers.

‘If you don’t have any kind of relationship with a customer, they’re simply not going to be a customer, says Brent Leary, a columnist for Inc. Technology and the co-founder and partner of CRM Solutions, LLC., based in Stockbridge, Georgia. ‘If we can build a relationship where they know who we are, they like what we can do, and give an example of how we can help them, then we can give them the trust and that helps solidify relationships.’

This is part of the Embroidery Business Marketing System program that I am teaching. Click Here to get signed up for it. I have a lot of great information for you!

A Marketing Plan Is Essential For Your Embroidery Business!

A Marketing Plan Is Essential For Your Embroidery Business!

When I first started my embroidery business, I thought that all I had to do was put out my sign to let everyone know that I was now in business! I soon found out that getting customers was not as easy as I had envisioned. I really loved what I did, but I had no plan in place to attract new customers. This is not the right way to get your business started! I learned very quickly that a Marketing Plan was essential for my embroidery business and I needed to have a plan in place for every aspect of my business!

What is Marketing?

Marketing in my own simple terms is All of the things that you do to get your product in the hands of the right people!  It is also all of the ways that you do to get the word out about your product or service.

The most important process in getting ready to market your embroidery business is to create a working plan. A working Marketing Plan is essential and you want one that will help keep you on the right track. If one strategy is not working, you can go back and review your plan and make some changes, but without a working plan you spend your time running in circles and do not have any idea as to what to do or where to get started.

The Starting Point For Your Marketing Plan!

You need to create a simple picture of your next 12 months. By that I mean what is going on around you in the next 12 months. What are the holidays, special happenings, the different times in a persons life that they need gift items, school sport seasons, and corporate events that take place in your area. These are just a few of the areas that you can cover. Make a list for each type of event.

  • Do you have a Niche Market?
  • List the events that are held throughout the year.
  • What type of items are needed for each one?
  • What months do each of these happen?

Write down each month that these events are happening in. You can plan special promotions around each one? This is the beginning of your plan.

In this economy today we have to be very proactive and not sit and wait for the next customer to walk in the door. It is not going to happen! There are too many choices for them and we have to make sure that we are in their mind first and foremost so that they will think of us instead of the competition when they need our services. Without an actual working plan it is very hard to be proactive.

People need you and what you have to offer. All you have to do is make them aware of what you have, work with them to find out exactly what they are look for and you can create the perfect relationship.

Once I put a Marketing Plan together and started working my plan, I found out that letting everyone know that I was in business was not as hard as I thought it was going to be.

If you do not have a Marketing Plan written out, take the time to get it started today. This is extremely important! Without a Marketing Plan it is very hard to grow your business and keep yourself on track!

Click Here to help you get started creating your own Embroidery Marketing Plan today!


“Taking The Guess Work Out Of Embroidery On Caps!”

“Taking The Guess Work Out Of Embroidery On Caps!”

Are you afraid of doing embroidery on caps? Do you put it off because you are unsure of exactly how to do it? Do you refuse to work on caps because they feel intimidating? If you feel like that, I can surely understand this. I was so afraid of caps when I first started my embroidery business. I absolutely turned down every job for caps, from anyone that wanted embroidery on caps or even brought them to me. This was like a foreign country and it absolutely scared me to death!

One day I had a customer come in and was desperate for one single cap and I decided to give it a try. Now back in those days, I did not have a cap machine and I would embroider on unfinished cap fronts and then send them to the cap manufacturer to have the cap fronts made into finished caps. That was simple and I did not have to deal with the blank caps. This was before they even made cap machines. When my customer only needed this one cap, I knew that I would have to embroider it flat but I was totally unsure of how to do this. I decided that I would treat it like any other item that I could not hoop and glued it down to backing that I had hooped. It worked and my customer was happy!

They have cap frames now that you can use to embroider fronts flat that holds the bill down. They are mainly made for the home machines that do not have the cap frames for them.

Once I got over the fear of that one cap, I started taking cap orders for finished caps and it was not nearly as hard as I had envisioned! I am so glad that I took that chance to overcome my fear of even trying to do embroidery on caps.

I then decided to purchase a 15 head tubular machine that I could easily use to do embroidery on caps and started taking cap orders on a regular basis. The next trick was to learn how to hoop them correctly and tight enough so that they would be straight and the embroidery would look great!

Here are some tips that will make it easier for you to cope with the embroidery on caps and help with taking the guesswork out of it.

  1. On structured caps, (6 panel caps with a heavy buckram lining in the front) steam press them first. This softens up the front of the cap, presses it flat and helps it to sit tighter on the throat plate of the machine. You can do this with a regular household iron.
  2. Use a 3 oz. tearaway backing that has been designed for caps. This is important. If it is a lighter weight backing it will not give you as good a registration. Sometimes you need 2 layers of backing to hold it closer to the throat plate.
  3. I always use a 70/10 sharp needle, but if you have needle breaks, switch to a 75/100 needle. Some people recommend 80/12 but I have never used this large of a needle on my caps. You cannot get the fine detail in the designs using an 80/12 needle. I use the 70/10 needles even on FlexFit caps.
  4. For best results, keep your design at 2.10 inches or less in height. This will allow for a design that can be embroidered on most caps. If it is an low profile cap or an unstructured cap (not buckram or lining behind the front fabric of the cap) then you may need to keep your design to a maximum of 2 inches in height.
  5. Make sure that you have the caps hooped tight and that you are using the clips on the side of the caps to hold it down. Place the clips at the bottom of the posts closer to the bottom of the cap. This will hold it in place but it will not distort the design at the top of the cap.
  6. Make sure your designs are starting from the bottom up and from the center out. If you are having your designs digitized, make sure that you tell the digitizer that it is for a cap and you need to have it start at the bottom and from the center out.
  7. Make sure that you have ample underlay to anchor your cap backing to the cap front to keep good registration.
  8. If you are embroidering a 2 color letter, embroider the inside first and then the outside of the letter before going on to the next letter.
  9. If you have a large fill area in the center, run a zigzag stitch up the center of the cap before actually starting the design. Tell your digitizer to do this if you cannot. This will help to anchor the design and keep it from pushing and pleating the fabric in the center.
  10. Start your design on half to three-quarters of an inch up from the metal strap that goes across the front and is sitting on the bill of the cap. If you have a short design, move it up to be in the center of the cap. If it is a tall design, then start it at the one half inch point up from the strap.

When you can learn to embroider on caps and do them efficiently, they will be one of your biggest money makers! Embroidery on caps is a constantly growing business and you do not want to miss out on this huge money making opportunity!

For more information on “How To Embroider On Caps”  and other programs to help you grow your embroidery business, click here!

The Fastest Way To Increase Production In Your Embroidery Business!”

The Fastest Way To Increase Production In Your Embroidery Business!”

We all want fast! We all want the jobs to fly in the door and fly out the door with as little effort as possible! While that sounds like a dream scenario there are some very small steps that you can take that will increase your production in your Embroidery Business is a huge way! Here are 9 tips that will help you increase your production drastically!

  1. Keep your machine clean and maintained daily and you will have fewer issues, less down times and fewer tech costs. You need to clean out the bobbin area every single morning and oil it. You need to oil it again at noon or after every 4 hours of running time. This will help you keep your machine in tip top shape with far less downtime. Your production time alone will increase through this daily habit.

  2. Set up sharp needles on half of your machine and set up the other half of the machine with ball point needles. This will save you a lot of time when you have to switch from knits to woven fabrics. It is much faster to change a cone of thread than to change a needle!

  3. Keep the colors of thread closest to each other for your thread changes in your design. Example: If the design has 3 colors, place the 3 colors next to each other so that the machine will have less travel time from one needle to the next as it changes colors.

  4. Time all of the steps in each of your processes. Keep track of these times and try to better your best at all times. Encourage your employees to do the same. Maybe an incentive will help to make them move a little quicker with each step.

  5. Add the job to the schedule or tracking sheet as soon as it arrives or the order is taken. You may not have all of the information to complete the job at that time, but it needs to be logged in and kept track of immediately!

  6. When each step of the job is completed, add that to the tracking sheet to see the progress.

  7. When you have all of your information and the job is ready for production, assign the jobs to certain machines and put the schedule on the machine where the work will be completed. This schedule should be created the night before the job is to be run and the schedule should be placed on the machine that it is assigned to.

  8. Pay attention to the time that it is taking your operators to do the job. If your schedule is formatted correctly, the time allotted for the job will be right on the schedule. Make sure that it is being completed during that time frame. Employees seem to move faster when they know that they are on a schedule and are being timed.

  9. Plan your production so that you are running like kind jobs. If you have your machines set up for caps, run all of your cap jobs at one time instead of breaking down the machine for each individual order. Plan 1 day a week for caps and stick with it unless you do not have any caps for that week. Do not plan by date order. Plan it by type of products, hoop size and colors that you have on the machine at the time.

Following these tips will give you the fastest way to increase production in your embroidery business and you will be able to get more products out in a weeks‚ time using this method. More products out each week, more money in! This can greatly increase your monthly bottom line!

I have developed a simple and complete Embroidery Production Tracking & Scheduling Form‚ that will help you to keep track of each step of your production and give you the time that it should be completed in. This form is part of the How To Price Embroidery Program and will soon be available as a stand-alone product. It is a simple form for you to use and will help you to keep total track of your embroidery that is all formatted and will automatically figure the time that it should take for each job!

How Do You Figure Embroidery Pricing For Multiple Locations?

How Do You Figure Embroidery Pricing For Multiple Locations?

How do you figure embroidery pricing for multiple locations on the same garment is a question that I have received many times. Do you add all of your logos together for that same garment and charge them for one design? The answer to this is NO you do NOT!

When a customer asks for embroidery in several different locations on the same garment, you should treat each and every one of those applications as a new embroidery. You are rehooping your garment, you are uploading a new design and you may even have to change some of your thread colors on the machine. This can be a lot of work. Many people think just because it is on the same garment that you should add all of your stitch counts together for the price of one logo. If you do that, you are losing a lot of money and time and it may turn out that you are actually doing the job for FREE!

This same scenario goes for the price of the setups or digitizing for all of those different designs. Each one of them is different and needs to be charged accordingly! You have the same amount of time setting up each design for one garment as you do for 100 garments and you need to be paid fairly for your work.

Many times a customer will come into your shop with one garment, such as a race car driver that has several sponsors and he or she wants to have the logo for each sponsor created and embroidered onto their fire suit or crew team uniforms. They are not expecting that the price is going to be very inexpensive because all of the logos are embroidered on one item.

Embroidery pricing in Multiple LocationsAt one point when I had my large embroidery shop, we made a lot of crew uniforms, both shirts and pants and embroidered them in many different locations. I have a set of uniforms in the picture to the left that I made for a company that sold concessions when it was the Winston Cup series.

The shirt to the right is a Cyclone racing shirt that was prCyclone Racing Shirt by Stella Apparelovided by Stella Apparel in Southborough, MA. They did a great job on it. As you can see it is embroidered in 5 different locations. It may also be embroidered on the back as well.

Your customer has no idea as to how long it takes to actually create each one of these designs and of course, it is all computerized so it surely cannot be much work, Right?

This type of customer can sometimes be very hard to deal with but they need to be educated about the process. Figuring your embroidery pricing for multiple locations is not hard but you have to remember, each logo or embroidery is separate and you need to figure the embroidery pricing for multiple locations as all individual designs! They cannot be combined as one embroidery unless you can combine them into one hoop. This cannot usually be done unless it is a name that is added to a logo.

If you are not sure of your pricing or if you are not making a good profit, check out my course, How To Price Embroidery!

You will be glad you did! It will help you to avoid many mistakes that so many embroiderers make and it will help you create a profitable embroidery price list!


“12 Years From Zero to $1,500,000 In Sales In Their Decorating Apparel Business!”

“12 Years From Zero to $1,500,000 In Sales In Their Decorating Apparel Business!”

I wanted to end this year of 2015 with a story about Howard & Amanda Potter, one of my most accomplished students! They own A & P Master Images of Utica, NY and built their business in 12 years from zero to $1,500,000 in sales in their decorating apparel business. I am so very proud of how they have worked so hard to build up a great business and of what they have accomplished in a few short years! Part of this story was written by me and part was written by Howard! I wanted to share this with you because many of you struggle so hard to even pay your bills or get to the point where you are making enough money to pay yourself a salary. I wanted you to see what is possible for each and every one of you!

Howard and I started working together almost 10 years ago and he has been a huge inspiration to a lot of people. He is kindly sharing his story with us.

“Some of you may know of me and some may not. I am a young man that had it rough growing up in life. So rough that at certain points I was at food pantries, and going to lawn sales for school clothes with my mother. From the age of eleven until I was eighteen, I grew up in the “House of the Good Shepherd” in Utica, NY.

After the group home I went to college for graphic design and during that time I met my futureHoward & Amanda Wedding Day wife Amanda Potter. Shortly after two years of dating, we bought a house and got married in the back yard on August 31st, 2002, at the ages of 21 & 18. Within the year of being married, we had our first child Angelena.

At that time I had an idea to start a graphics based business. I was working 60 plus hours a week pouring metal and started the business from a 15‚’x15‚’ room in our house as just a graphic design business at first. I quickly found out that just doing design could not be supported well in my area, so I started researching customizing apparel. When I was in college I learned the basics of screen printing. After some research, I came across selling promotional items, sublimation, and embroidery. I decided to still offer my graphics, and bring sublimation in house first since it was one of the cheapest options and no one really knew what it was.

I built my business up by farming out screen printing and embroidery while I was offering the promotional items. This was a good way for me to get going. I was putting in 15 to 20 hours a week with the business as a hobby since I had a great paying job.

After my second year in business we did about $30,000 in sales. Which really is not a ton, but I was having fun with the business. From there I started researching embroidery heavily and stumbled across “Tajima” embroidery machines which Joyce was a sales rep for Hirsch at the time. They got me in contact with her.

My wife and I went to her house and she showed us the basics of the equipment and took the fear from running a piece of equipment away in a matter of minutes.

From there, I had my goals set on bringing embroidery in house for several reasons.

  • One I could run things and still design at the same time.
  • Two it was clean.
  • Three it did not take up a lot of space.
  • Fourth and the most important reason. I knew Joyce could teach me how to run the equipment. After the single head embroidery machine was delivered, we set up a couple days of training with Joyce for my wife and I.

Within two days we started running orders and making money right away. My very first order on my own was for the group home I use to live in. It was a pretty cool feeling to be doing work for them. Within a year of owning our first machine. We purchased a second one right away.

When my daughter was 3 and a half, our family hit a road block. Our little girl was diagnosed with a very rare disease. She is only 1 of 3 kids in New York State that has what she has. While I was by her bedside, my employer was calling day after day to see when I was coming back to work. Which they had every right to, but I did not want to be held back by my job to be by my daughter‚’s side. I made her a promise that time in the hospital that I will always be there for her and took matters into my own hands. While I was with her, I had my computer and was working on designs for customers. That‚’s when it struck me that I could make money sitting from anywhere with my business and decided to focus on taking it full time.

I worked over the next couple of years 80 plus hours a week to build the business up the right way. By the time I quit my job to work the business full time, I had closed out all of my retirement and paid off much of my personal debt to lower my monthly bills, and created a base of customers that could support my bills. That following year we did around $120,000 in sales from our home.”

———-

I wanted to cut in here and give you a little history about how they worked together from the beginning. Amanda worked at the bank during the day and Howard took care of both the toddler and the baby while she worked. He also ran his business during the day and catnapped when he had a chance. Amanda took over running the machine during the evening and of course taking care of the babies while Howard took a nap before leaving for his job. He worked his regular job at night during this start up time. They have been an amazing team from the very start!

Now back to Howard!

“I am not telling you all of this to get you excited to think you can make quick easy money. My wife and I made many mistakes during these trying times, but Joyce was always there to give us guidance or teach new things that we did not know about the business. Because of Joyce we made less mistakes and were able to make more money faster on the embroidery side.

Everything she teaches you can make you money or save you money. I say can, because you have to be the one making it work. She can only teach it to you. You have to apply it. Really look at how much time and money is spent going to college. The average college degree is roughly $25,000 to $50,000 roughly, right? This is with no guarantee of making any money. Let‚’s do some basic math and see if you think this is worth it. Again, she can teach you anything about the business, but you have to work it.

I have probably spent at least $15,000 or more on teaching my staff and I over the past 10 years. Our company has produced $6,675,000.00 in sales over the past 12 years in business.”

All of the sales may not be embroidery, but embroidery helped fund buying the equipment to help grow the business. This process allows you to do more work with less people. I have two full time staff in the embroidery department and this year we have done at least $375,000 in embroidery in a 20‚’x15‚’ room, two single heads, and a two head embroidery machine. Once in a while we will send an extra staff member in to steam, fold, and box. Really think about how tiny that space is. It does not matter how much you have, but what you do with it. Always remember that.


I am now 34 years old with a 5500 square foot building and adding a 3200 square foot addition to expand next year. Our company employs 15 full time staff, covers 50% of the health insurance if they want it, and now started retirement plans for them. Our company has won over 6 national awards, done work on four covers of national magazines for our industry, and has been published over 50 times in articles for these magazines.

Your company is only going to be as good as the people you keep around you. I know professionals from every process we offer. I know all of my suppliers/ vendors.

Investing in having Joyce train you, is no different than investing into a college degree. Except you control how much you can earn, Not your employer! So, figure out what you want out of life with this line of work and go after it! Only you can stop you with the right training.”

———-

Howard has been able to do this because he has his processes in place, thoroughly trained his staff, he plans each and every step of his progress and he knows his numbers! Howard has always known his numbers! At the end of 2015, he will be at the $1,500,000 mark! That is incredible for the amount of employees that he has. This type of growth does not happen overnight and it does not happen by accident! You must have a plan and work your plan diligently!

Amanda is in charge of accounting and is very involved with inside sales. Together they work very closely running their business and they are a true highly productive team and partnership!

Howard has stuck to retail sales, not contract work! I told Howard from day one that he would not be able to make it in this industry doing contract work for other companies and that he needed to stick to retail sales only. You need to be able to provide the product as well as the embroidery to build up a great business, especially when you are building up your business the way that he has. Contract work is done for pennies on the dollar compared to retail and unless you have a huge shop with many embroidery heads, you have to work too hard to make it happen!

Howard Showroom
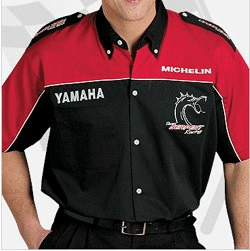
Howard‚’s business is a full in house source for anyone needing any type of graphic design work and promotional products. He offers everything from pens and cups with your logo on it to car wrapping! He offers it all!

He has perfected each decorating process and each department including the right person to carry out that decorating process before going on to the next type of process. You cannot start them all at one time and expect to make a go of it, it does not happen.

You also cannot expect to be a one man shop and offer all of the different types of decorating processes. Many people make the mistake of trying to offer all types of services to their customers and they are not capable of doing any one to perfection! DO NOT MAKE THIS MISTAKE!

I am proud of what Howard has become as a man, a business owner, a husband and a father. HeHoward Potters Family has 2 children now and both of them have some duties inside of the business. Howard is a very devoted father and he and Amanda are raising their children right with a great work ethic and wonderful life values. He provides family vacations, and spends a balanced life between his decorating apparel business and his family!

This is possible for anyone, but it takes planning, perseverance, the willingness to implement what you have been taught and the right attitude!

Thank you Howard for sharing your story with us and I look forward to another great year of working with you!
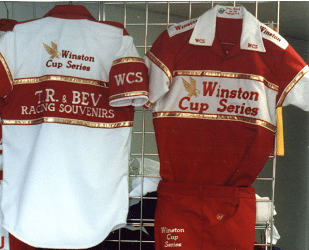