by The Embroidery Coach | | Embroidery Business Marketing
No matter how much you want it or how long you’ve been working toward it, the next level of financial success will not happen until you understand the power of planning. It doesn’t have to be difficult or take up a lot of time. Keep it Simple! In fact, planning can be fun and very rewarding. Planning is the key to your embroidery business success.
Planning can be done in many ways. There is no one-size-fits-all plan! You always hear, create your goals, and then work backwards to create the plan. This is true, and it works great, but it does not work for everyone.
2025 A year of Changes and Challenges
It is now 2026! We have just started week 1 of 2026. This is a whole brand new year and a time when you can start all over again, no matter what you have done in the past or how your business has been going. You can turn over that new leaf and start fresh! This part is really exciting.
2025 was not an amazing year for me, as it had many challenges. You may have experienced some of the same in your business. Now is the time for you to start fresh and get your 2026 Marketing Plan in Place, but before you can do that, you need to evaluate this past year and go over all of the positives and negatives that happened in your business throughout this past year!
There have been so many changes in my business, and I have felt like there have been some new beginnings from those changes. And I am happy to say that in 2026, I expect to see the fruits of the labor from all of those changes.
I have always done a lot of planning, and I try to work my plans, but sometimes our plans just do not work out the way that we expect, no matter how hard we try!
This was one of those years for me. I had many changes that took place in my business that I had not planned for, some positive, some negative, but there were three major changes that I would like to share with you that drastically affected my Marketing Plan for 2025.
- Rebuilding my membership pages in a new system that took twice as long as I had in my plan.
- I had to change autoresponders, and I lost some of my contacts. I am in the process of rebuilding my list. This also cut into my actual marketing time that I had planned for 2025.
- Most important of all, I decided to hire a coach to help me move a little quicker in my business, and that is a positive move! It helps to keep me accountable and make the right decisions.
My 2025 Marketing Plan Kept Me On Track
This does not mean that my marketing plan was a failure or that it did not work. It did work and kept me on track as much as it could, despite the unexpected changes that did take place. Without the guidance of my plan, I would not have been able to accomplish nearly as much as I did. Planning is key to embroidery success. I have all of my goals and accomplishments set for 2026, and the actions set to follow through with those goals for each month. I do not have the weekly plans set. I will do them towards the end of each month for the following month.
Even though my 2026 plan is basically finished, I expect that I will have to make changes as I go along because when I am creating my plan, I also have to stay flexible to accommodate those unexpected happenings.
Really Excited About 2026!
I am really excited about 2026. My plan is ready, and I know what I am going to be marketing each month. I will continue to do my weekly planning at the end of each month so that I will stay on track. Each Saturday, I sit down and plan out my week thoroughly, and sometimes I have to make adjustments during the week, but it really helps me to stay on track. Planning is the key to your embroidery business success. If you would like some help creating your plan for 2026, send me an email to joyce@theembroiderycoach.com
by The Embroidery Coach | | Embroidery Production
Some basic issues can have a huge effect on the quality of your designs. We need to go back to the basics to create high-quality embroidery designs.
Machine Speed
Machine speed has a huge effect on the quality of your design. I cringe when I see a machine going faster than 850 stitches per minute. I run mine on an average of 750 stitches per minute, but if I am working on caps, it is down to 600 or 650 spi at max.
The machines are being sold on the fact that they operate at a significantly faster pace, allowing for more production to be completed in a day. Yes, this is true, but it can also cause many issues that slow down production. The faster your machine is sewing, the more pull you have on your thread. This can distort your small lettering and in satin stitches that border fill areas. The faster the machine speed, the tighter the thread pulls, and the narrower the stitch sews out. If the machine is going too fast, it can skip stitches or force the needle to penetrate in a bad spot and form a stitch that is uneven, such as on heavy pique or fabric that has wide ribs, such as twill. This really shows up on a twill cap.
The machine speed can also cause the thread to come out of the needle at the beginning of sewing, and can leave a long thread or a loop at the beginning of the first part of your stitching.
Bad Tension
Your machine needs to be using either rayon or polyester thread. You should not be switching back and forth if you can help it. This is something that we have to do at times, and I am very unhappy when we have to do this, but we have customers that insist on a certain shade, and if it matches in the rayon rather than the polyester, then that is what we use. I do not want to use any rayon thread on a garment that is going to be washed in the strong laundry detergents because it can fade. We do not have many issues with our thread bleeding.
If you stick to polyester, you eliminate a lot of issues. In today’s world, this is the thread that you should be using. We have been gradually switching over, and we are using more and more polyester. It is much stronger, and of course, it will not fade out when bleached. Your polyester thread has to run with a tighter tension than the rayon thread. When you are switching back and forth, it is very tough to keep your thread tension correct. It needs to be adjusted for the different types of thread.
Worn or Wrong Needles
Worn or Wrong Needles can create holes in the fabric. On knits, it can create runs. You really need to be careful with this. Sometimes you can get away with a sharp needle on a knit, such as a pique, if you are using the 70/10 needles and they are new needles. It is strongly recommended that you change your needles to ballpoint needles if you are working with knits, especially the performance wear knits. You can almost count on holes in your fabric if you do not switch to the ballpoints on those types of fabrics. This can have a huge effect on your design.
They recommend that you change your needles every 2,000,000 stitches or after every 8 hours of constant stitching on that same needle bar. That is hard to keep track of and something that we really do not do, but I always had operators who were very detail-oriented and knew exactly when the needles needed to be changed. You can hear the difference in the sound when the needle goes down into the fabric. This comes from lots of experience and a lot of trial and error.
Wrong Backing
Using the correct backings or stabilizers is extremely important in stabilizing your design on your garment. If you are using the wrong backing or a cheap backing, your design can rip right through the backing, and it just does not sew out very good. It becomes very distorted, especially after it has been laundered.
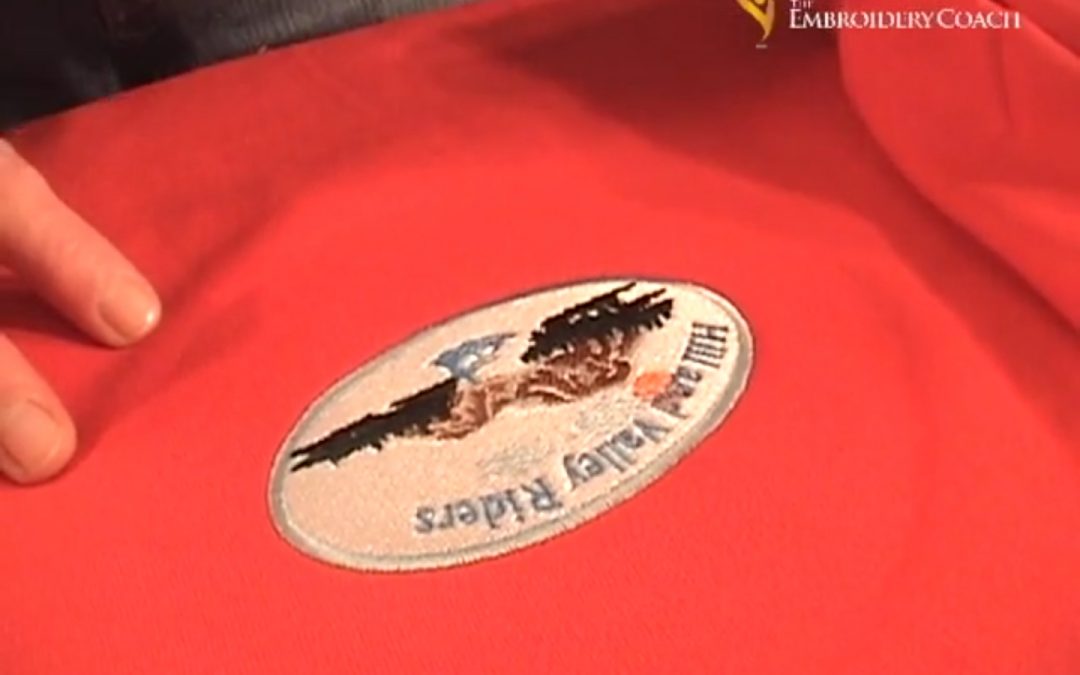
This is something that you have to be very careful of. For all of your wovens, you need to use a tearaway backing. Do not ever use a cutaway on the woven fabrics, not even the no-show. Many times the backing shrinks, and it will cause the design to pull up and pucker. I have had several complaints about the no-show backing shrinking. I have had several students tell me that they have discontinued using it because it was shrinking and their designs were distorted after they had been washed. I have some items here that have been washed, and you can plainly see that this no-show has not shrunken at all! You need to always use quality backings.
Cheap Supplies
Do not use cheap bobbins either. This is huge! Not only do they slow down your production, but they run very erratically, and it is almost impossible to keep an even flow of tension. I highly recommend the Filtec bobbins. They can run all the way to the end without the tension changing, and rarely do we have a bad one. Yes, they are more expensive, but the difference is the look and the production, which more than pays for the difference in cost.
No Topping On Your Knits
This is a tough concept to get across to a lot of people. The difference in your designs is night and day when you use them. Every knit that went out of my shop was done with a topping on it. It keeps the thread on top of the fabric instead of letting it sink into the garment and is very easy to remove. Yes, it is another step, but at the same time that we are steaming it off, we are also removing the hoop mark from our item. I do not ever want to see a garment go out of here with a hoop mark on it. There is no excuse for that one at all.
Garments Not Hooped Correctly
When you are hooping your garments, you want to make sure that they are tight enough. If it is, there will not be any movement of the fabric inside the hoop, and you can hear a drum noise when you tap on it.
Size of Hoop
The size hoop that you use is critical. Many embroiderers will use the same 15 cm hoop for all of their designs. This is fine if the design was created for that 15 cm hoop, but if the design is smaller than that, you will not get the same effect.
Many times, we just need to go back to the basics to create high-quality embroidery designs. We sometimes forget the basics and how important they really are.
by The Embroidery Coach | | Embroidery Business Marketing
This is Joyce Jagger, The Embroidery Coach. Here at The Embroidery Coach, we help embroiderers master embroidery skills and succeed in growing their embroidery business.
Through online training and private coaching, I help you avoid pitfalls as you are learning how to grow your embroidery business.
People come to me because they are frustrated with their business. It is not as easy as they thought to build their embroidery business and many times, they do not know what to do next. In a simple email or a phone conversation, we can steer you in the right direction.
It may be a single course that I have created, it may be multiple skills that you can easily learn inside of the embroidery business academy or it may be some personal coaching designed just for you. Our goal is to help all embroiderers succeed!
Today’s tip is about concerning embroidery on caps.
“Why you Have Thread Breaks or Needle Breaks When Embroidery On Caps.”
- Cap too stiff
- Not walking the machine at the start
- Wrong needle or Bad needle
- Cap does not sit on the needle plate
- Design too low on the cap
- Lettering too small
- Too many locks & trims
Pressing Caps To Prevent Thread/Needle Breaks!
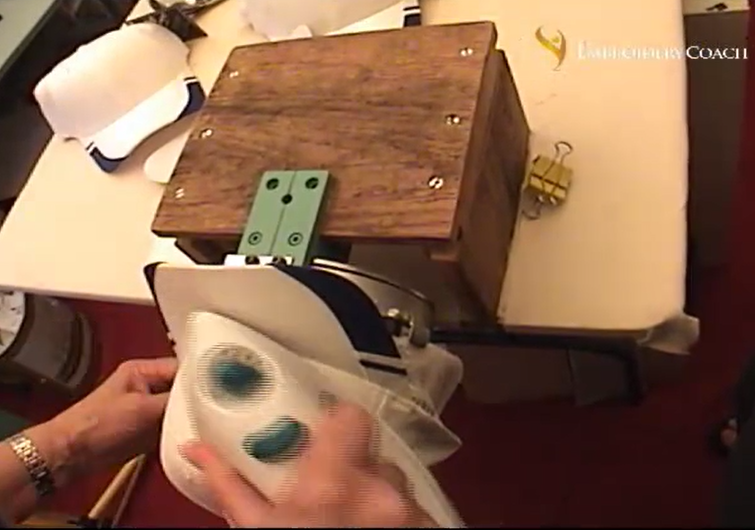
I have found that by pressing the cap fronts of those stiff caps, especially the Flexfit caps, solve many problems with thread breaks, needle breaks and flagging. I press most of my 6 panel structured cap fronts.
To Press the cap, I lay a folded hand towel over the top of my cap framing device, put the cap over it, just like I was going to hoop the cap and then I use my household iron and press it with steam. If you have a cap press you can use that, but you may have to spray the cap with a spritz of water to create some steam. The steam really helps with the total process.
By pressing the cap fronts you are tightly adhering the backing to the top fabric and softening it up, flattening out the center seam and removing the hump that is in so many of them. You can see the difference in the two caps. This helps the cap to sit closer to the needle plate and reduces a lot of the flagging. Pressing the cap fronts has reduced my thread breaks and needle breaks to almost nil.
I have a video inside of the Embroidery Business Academy membership site showing you exactly how to do this.
I hope that you will find this tip helpful. If so, please respond below this video and let me know. I have a free ebook for you. Just go to MasterEmbroiderySkills.com
Embroidery Business Mastery, “The 3 Skills For Every Successful Embroidery Business”. Go pick it up today!
If you have already received the Free Ebook, check out Embroidery Business Academy.com.
I have a whole module on working with caps inside in the first Skill Set of Mastering Embroidery Skills. This is the perfect place to start your embroidery business training.
by The Embroidery Coach | | Embroidery Business Management
Happy New Year! Here we are at the beginning of a brand new year. This is my favorite time of year, the time when we an actually start all over again. We can start with a whole new slate and create a brand new plan. Before you can do that you need to think about over the results of this past year. Are you happy with the bottom line result that your embroidery business brought you during this past year? Are you where you thought you would end up at the end of the year? Did your business see growth this year or did it end up about the same as last year? Many embroiderers that I have talked to ended up about the same as last year and are really not happy with their end result. Some of my students that their best year yet! This is what I would like for all embroiderers. I want to talk a little bit about how you can make 2025 a much better year!
Do you make any New Year‚’s resolutions at the first of the year? How do they usually work out for you? I have not made any in many years. I found that I made all of these promises to myself of things that I was going to do, but I did not have a plan to make any of them happen.
Every year at this time I sit back and reflect on what I accomplished during the past year, what I could’ve done better and what I will do moving forward into this year! It is always such a feeling of relief and joy when I know that I can start all over again for another year and be able to make new plans to move my business forward in a more positive manner.
This past year was a great year for me but like every other year, I could have done more to make a difference in more embroiderers businesses.
I feel that my purpose in this world is to be able to help more embroiderers succeed in their embroidery businesses and make it easier for them to run their business and not have to go through so many struggles.
There are a few things that you need to do at this time of year to prepare for making this the best year of your embroidery business!
- Find out where you are financially at this time. Without knowing exactly where you are you cannot make plans to move forward based on your current situation.
- Go through your accounting software and make sure that all of your accounts are correct in your computer. Make sure that all of your accounts are totally correct before you do your end of year accounting. This is very important. Sometimes the computer does not always pick up everything or your information may have been saved to the wrong accounts.
- Next, you need to figure out where you want to be at the end of 2025! How much of an increase do you want to see in your business this year? Let’s talk about a 25% increase.
- Take that 25% increase over your 2024 year sales and divide it up into 12 months. How much of an increase do you need for each month? Divide that into how much for each week to reach that goal. Your weekly figure is truly the only figure that you need to focus on. It is a much smaller figure than the 25% increase over the entire year and seems more realistic to work towards than a larger figure.
- Create a list of all of the events that you want to be involved in this year that can help grow your business. Lay them out month by month and put a plan together for each of these events.
- If you are having a hard time thinking up ideas to grow your business this year, sit down with your accountant or a coach that can help you put a plan together.
How about this year instead of resolutions, you write out your goals and create a plan to accomplish those goals? Doesn’t that sound much better and more doable? It’s doable because you can create your own Action Plan and can plan to accomplish small pieces of that goal each week until you have reached your big goal. It is not hard, but it does take consistency and dedication. You can reach that goal if you really want it! You MUST really want it!
For more information on how to set up your accounting system to work great for your decorating apparel business, click here!

by The Embroidery Coach | | Embroidery Business Marketing, Embroidery Business Planning, Organizing
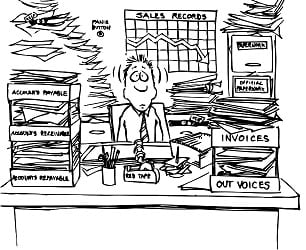
Bookkeeping is one of our least favorite things to do as embroiderers! We did not start our embroidery business so that we could do bookkeeping! We are born creators, not bookkeepers, but unfortunately, it is part of owning a business and is an essential part of the business that we must be on top of! You may feel like you are drowning in paperwork. Setting up a complete embroidery business bookkeeping system is essential in staying organized.
It is critical to organize every part of your business, and your records must be organized for easy and accurate bookkeeping. Without good record organization, it can become very overwhelming when you need to produce some important information, and it can cause unnecessary stress in your personal life and your business.
Have you spent many days just before filing your taxes trying to get everything organized? Trying to pull it all together at tax time when it is disorganized is really hard and time-consuming, not to mention how frustrating it can be. You could be spending this time getting more jobs out, but instead, you have to stop producing your embroidery and concentrate on the taxes in order to stay compliant with the government.
Your business generates a lot of paperwork and it can easily get out of control if you do not have a good system for taking care of it. This was a huge struggle for me until I realized that I could not continue to do it as I was and get my jobs out at the same time. I had to take some time out, stop the crazy disorganization of papers, and get my books in order.
Keeping accurate financial records is necessary for the growth of your business. You need to be able to look back and compare one year to the next so that you can plan more efficiently. You also need to know which area of your business is performing the best and in which area you are not making enough money. Without accurate records, this is impossible.
If you are new to bookkeeping and you have not started to use any type of accounting software you must first go through and organize all of your records. You must have them in order before you can even think about using any type of accounting software.
Start The Process of Organizing Your Bookkeeping Records for Your Embroidery Business Bookkeeping System Set Up!
Step 1- Separate the receipts for your expenses and for your income. Make sure that you have every little piece of paper because it can make a difference at tax time.
Step 2– Take the pile of receipts of your expenses and separate them by the month. Do the same for your income.
Step 3– Separate the piles of expenses and income for the first month into piles of like kinds.
Step 4– Create a spreadsheet with columns of the like kinds for your expenses and add the receipts into each column that is applicable. By like kinds I mean, Office supplies, loan payments, travel expenses, etc.
Step 5– When finished with the month, place the receipts into a file folder marked by the Month and place the file folder in a file drawer. Keep one file drawer for this purpose only.
Step 6– Repeat this process for your income statements.
Step 7– Total each column of expenses for the month. Do the same step for your income.
Step 8- Repeat this process on a separate spreadsheet for each month.
Organizing them in this manner will make it easier for you to start the process of working with accounting software. I know that the term accounting software is scary if this is all new to you, but it really is very simple to use once you have your expenses and income organized.
On February 13th and 14th, I am having an Embroidery Business Bookkeeping System Workshop where I will be showing you how to set up your entire bookkeeping system. This will be a 2-day workshop from 10:00 AM to 2:00PM Eastern. This is your chance to be able to get your entire system set up the correct way so that you will be able to see which area of your business is profitable and which area is not profitable.
I am using QuickBooks but this entire system works no matter what accounting or bookkeeping program you are using.
Click here to get signed up! Don’t hesitate to get signed up! We only have a limited amount that we can accept!