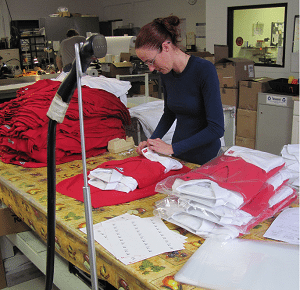
The finishing of your garments after you have embroidered them is very important! These important details in the embroidery finishing process can help to raise your level of customer service. There is far more to finishing than just removing the backing and folding up the garment. There are many details in your Embroidery Finishing Process that if you pay close attention to; will increase the value of your business.
When you are going through the finishing process there are many details and problems that you need to look out for.
- Thread Tails
- Missing Stitches
- Stray Threads
- Loops in the Embroidery Design
- Is Embroidery Straight?
- Garment Stains
- Damages
- Buttons Missing
- Zippers Not Working
- Bobbin Pull Up
Thread Tails: Trim off as closely to the garment as possible but be careful not to cut off any lock knots.
Missing Stitches: If you find some stitches that have been skipped and are missing, they will need to be repaired. The easiest way to do this is to thread a hand sewing needle with a double strand of matching embroidery thread and do a satin stitch by hand to fill in the missing stitches.
Stray Threads: Thread that sometimes get caught during the embroidery process trail across the embroidery. Trim as closely to stitching as possible being careful not to cut off any lock knots. Gently remove with tweezers.
Thread Loops: If you see thread loops that appear in the same direction as the stitching – DO NOT TRIM LOOP! Use your fingernail to scratch loop to backside of garment. Use ONE DROP of Fraycheck on back of stitching where loop has been scratched back. Do Not Allow Fraycheck to get on garment! ALWAYS USE FRAYCHECK ON BACK OF GARMENT-NEVER ON THE FRONT OF THE GARMENT!
If thread loops in a different direction than the stitching, it is usually safe to trim. Trim as closely as possible to stitching.
Crooked Logo or Embroidery: If the embroidery appears slightly crooked, lay the garment flat on the trimming table. Steam embroidery area. While embroidery is warm, lay the palm of your hand flat on top of embroidery and gently twist or turn your hand in the opposite direction that the embroidery is running. Do this a couple of times. Allow garment to dry and check embroidery again. If embroidery is not straight, repeat the process.
Spots/Stains on Garments: There are various methods for spot removal depending on the type of material and type of spot. Most spots can be removed with a drop a dish soap and water. If this does not work, once the garment is dry, you can spray the area with acetone. You will need a professional acetone spot cleaner or sprayer for this application.
Do not use the acetone on fleece garments or Wind jackets, garments that may bleed or near any type of trim that may bleed onto garment. You will need to experiment with different fabrics and keep notes on what worked out well using the acetone and which ones did not.
Damaged Garments: If any garment has been damaged during the embroidery or hooping process it must be removed. Do not try to pass a garment with any damage on it. The customer will be very angry. Bring it to the attention of the customer and let them decide what he or she wants to do. I will either credit the customer for the garment or replace it, but I leave that decision up to the customer.
Buttons Missing: Many times buttons can be replaced if they are missing. If it is a garment that buttons down the entire front, sometimes there is an extra button at the bottom. If it is a branded button that cannot be replaced, let the customer know about it and let him decide what to do. Most of the time if is not the fault of the embroiderer, but it still needs to be brought to the customer’s attention.
Zipper Not Working: This is an issue that should have been discovered when the garment was checked in. If not, again bring this to the attention of your customer. If you embroidered the garment and the zipper was broken, you are responsible for that. The manufacturer will usually not replace the garment once it is embroidered even though the zipper was not working when you received it.
Bobbin Pull Up: There will sometimes be bobbin thread noticeable throughout darker stitching in some logos. These stitches will need to be colored with a fine tipped permanent marker the exact shade of color as your thread. This is a very tricky process and again you need to experiment with this until you get the method perfect. It can be done. Do not touch any surrounding areas with this marker. Do not try to cover up a large area, that will not work! This is just for a small spot here and there on bobbin thread showing through on the top stitching.
Make sure all garments are buttoned and zipped before folding and packaging. Paying close attention to these important details in the embroidery finishing process will make a huge difference in your presentation and will show your customers that you are very interested in their business. This will definitely raise your level of customer service!