How To Control Production Spoilage In Your Embroidery Business!

How To Control Production Spoilage In Your Embroidery Business!

I go into many embroidery shops to do on-site training and I am totally amazed at the amount of spoilage that I see in boxes. These boxes of ruined garments are very costly to the business owner.

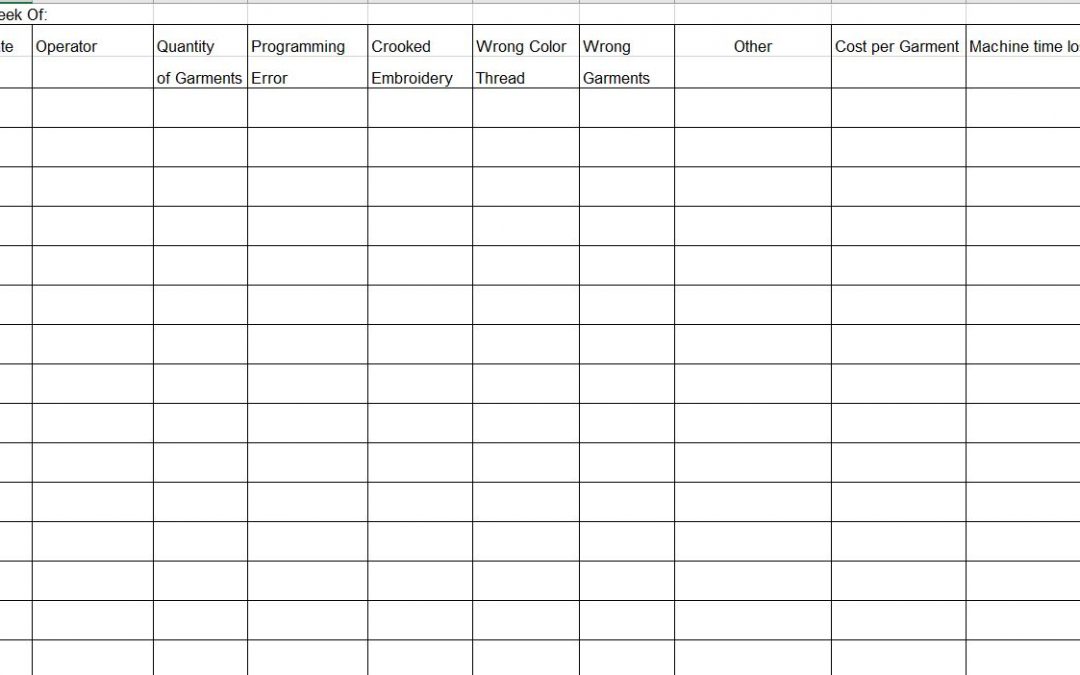
Learning how to control production spoilage in your embroidery business is an important step in reducing the total cost of operating your embroidery business. Operators should be required to show the amount of garments that were lost or ruined. This should be part of the production form that they are required to fill out at the end of each completed job. You must also know why the loss occurred. Keeping tracking the causes and the operators can help to reduce the loss and avoid them in the future.

Keeping a chart on a weekly basis of these losses is very valuable. This information can be reviewed at the end of the week and used to help retrain the operators in the areas that they are apparently lacking information. When operators know that they are being tracked, they have a tendency to be more careful and pay closer attention to detail.

Many people say that this is part of your Production Cost! I do not agree with that at all. This is a cost that can be almost eliminated if the employees are trained to pay attention to all of the details. Yes, there is some spoilage when a person first starts to be trained, but they must be trained from the very beginning that this is not acceptable.

Embroidery Industry Standard of Loss

There has been an industry standard for many years of a 2% loss. Many claim that a 2% spoilage rate is acceptable. You may have that in your contract, but many people will not do business with you if you have a spoilage rate that high. If you properly train your operators to be aware of all of the factors that can happen and how to avoid them, your spoilage rate will be greatly reduced.

I created a simple Wastage and Spoilage Report that you can download, print out and use to keep track of the production spoilage in your embroidery business. Just fill in the form below and I will send you over the Spoilage Report. Even if you are a one person shop, this will help you keep track of the costs that your errors create. This is a huge eye opener to everyone!

How To Save Time Using Computer Keyboard Shortcuts

How To Save Time Using Computer Keyboard Shortcuts

Using Computer Keyboard Shortcuts is a huge time saver. If you are like me, I spend a lot of time on my computer and every second of my day counts. I am either writing an article, creating a program, writing emails or working on a design for someone and I am very grateful for whatever time I can save.

Basic Computer Keyboard Shortcuts To Save You Time

These Computer Keyboard shortcuts are helpful also if you find that your mouse does not seem to be working or if you are on a laptop with limited space and cannot use a mouse. Here are eleven of the most commonly used Computer Keyboard Shortcuts for changing and editing text.

  • To select text shift + arrow left/right
  • To select an entire page of text shift + page up/page down
  • To copy text control (CTRL) + C
  • To cut text control (CTRL) + X
  • To paste text control (CTRL) + V
  • To undo your last action control (CTRL) + Z
  • To close a program ALT + F4 or ALT + F + X
  • To open the task manager control (CTRL) + shift + escape (ESC)
  • To tab between applications ALT + tab key
  • To return to your desktop Windows key + M
  • To lock your workstation  Windows key + L

My Favorite Computer Keyboard Shortcut!

It is very common for me to have several windows open at the same time and I just want to find something simple on my desk top but I do not want to have to go through and close everything down in order to reach it. I just hit the Windows key + M and it instantly takes me back to my desk top. I find this such a huge timesaver! This is my favorite computer keyboard shortcut!

If you have some favorite computer keyboard shortcuts that I do not have listed, please share it with us and I will expand my list to include it!

3 Tips To Help You Prepare To Make More Money In The Coming Year

3 Tips To Help You Prepare To Make More Money In The Coming Year

We all need to start thinking about how we can prepare to make more money in the coming year! I have been working on my new marketing plan and during this time I have come up with 3 Tips that may help you as you are preparing to make more money in the coming year.

  1. Create A Great Mindset!
  2. Set Your Goals!
  3. Start The Year Off With All Of Your Financials In Order!

Create A Great Mindset!

This is the very beginning and most important tip of the 3. That is why it is No. 1.
Do you have a great or positive Mindset? Many times our thoughts, especially the negative ones, are what hold us back from succeeding at what we want to achieve and may really be hurting our chances of having a successful embroidery business. I thought that I had a positive mindset but I discovered that I had fallen victim to a negative mindset and it was all of my own self-talk and negative feelings.

I wanted to charge higher prices for my embroidery work when I first started my business but then the negative talk started. I had been told so many times that there was no way that I was going to be able to make a living with an embroidery business that I actually started believing it.

We second-guess ourselves and we have doubts when this happens. With all of the negative thoughts and other people‚’s opinions, we soon tell ourselves that we aren‚’t good enough, smart enough, talented enough, or whatever to be able to charge the prices we want or need to for our work. So we end up just settling for what we think we can get and really create a tough struggle for ourselves.

This was a huge struggle for me when I first started my embroidery business and it lasted for almost 15 years!I was determined to have the highest quality embroidery of anyone that I knew of that was in the embroidery business and I was told many times that I had accomplished that. I was offering this very high-quality embroidery at a price that was as low or lower than the embroidery businesses that were offering low quality. How stupid was that!

I thought that my customers would not pay the prices that I really wanted to charge and I found that the secret is not to project your thinking & feelings onto your customers! This mindset held me back for 15 years! Since everyone else was charging low prices, I thought that I had to stay in line with them or charge less to get the customers. That mindset almost cost me my entire business!

I did not realize that what I had to offer was a product that I could have priced much higher right from the beginning of my business but my mindset had blocked my ability to see that. It took my accountant practically batting me in the head to get this point across.

It was a struggle for me to change that mindset but with his help, I was able to do so. I guess you would say, he was my first business coach. When I changed my total mindset and started promoting my quality product and excellent customer service I had plenty of work! Most of my customers were already coming to me for my quality and service and when I raised the prices, they were OK with that.

I would love to be able to convince you and all embroiderers that you need to charge for your expertise. We are not or should not be struggling artists! We are highly skilled professionals and should be paid accordingly and you need to develop the mindset of a professional!

Set Your Goals For The New Year!

Now is the time to start thinking about the new goals for the coming year! This year is already half over and we need to be prepared to get the new year started off on the right foot! Are you on target to reach your goals this year? If not, how far are you from reaching them? What is the obstacle that is in the way that has prevented you from reaching your goals?

Sit down with a pad and paper and look back over each month of this past year and see where you were and think about what you could change to make this next year a more profitable year.

Now is the time to set your new goals for the coming year. Do not wait until January gets here. You need to get prepared months in advance so that you can start January off with the right plan to reach those goals.

Setting your goals is the very first step in creating your plan for the coming year. Do not set goals so high that you cannot reach them and do not set them so low that they do not mean anything. Set your goals a little out of your reach so that you do have to stretch in order to reach them.

Write down your Goals. I have found that if I commit to them on paper, not just on the computer, but actually writing them down they mean a lot more and I am more apt to follow through and reach my goals. You must create a plan for each one of your goals in order to be able to reach them.

Start The Year Off With All Of Your Financials In Order

Do you know how where you will stand financially for your year end? I know that the year has not yet ended and we  are few months away, but you should be able to anticipate how your year is going to end.

Are you happy with the results of where you are presently? Can you run off a quick report and see where you are today? You may or may not be happy with the way that your year is going to end or where you are today, but knowing exactly where you are financially is the first step in being able to make a change.

Without the knowledge of your current status, it is impossible to create a plan that is going to help you reach your goals and make the necessary changes in your business to do so for the coming year.

If you cannot run off a quick report to find out where you are, you need to start preparing to get all of your financials in order and be ready to start the new year going in the right direction. By the time the year ends, you need to have all of this information gathered.

  • All of your expenses, month by month
  • Your credit card purchases
  • Your Bank Statements
  • Loan information

Your next step is to see if you are making a profit. If not how far are you behind? Do you know your break-even point? This is exactly how much money you need to be bringing into your business each day, week or month in order to pay all of your bills, including a salary for you! You need to be rewarded for all of your hard work.

You need to know which area of your business is profitable and which area is not. This is the only way that you can realistically make the right course corrections and start your plan for next year. If you find an area in your business that is not profitable, get rid of it. It is not servicing you well and is costing you money.

Change your mindset, Set your goals and get your financials in order. This is the beginning of creating a great plan to help you make more money during the remainder of this year into next year!

If you will do some serious thinking about what I have given you in this article and start applying these tips, it will help you to get prepared for the coming year.

7 Tips To Help You Embroider Designs On Caps With Ease!

7 Tips To Help You Embroider Designs On Caps With Ease!

Here are 7 tips that will help you embroider designs on caps with ease and save you a lot of unnecessary frustration. Trying to get high-quality embroidery designs on caps can be a real challenge when you are new to embroidery but with a little practice and experimenting, you can overcome many challenges.

  1. For best results always start your design from the bottom up and from the center out. For better registration always finish one section of the design before going onto the next if at all possible.
  2. Your embroidery design for a standard cap should not be more than 2.10 inches High and if you are working on a low profile cap it usually cannot be more than 2 inches high. I try to stay within the 2-inch high category for all of my cap designs. Very often your customer will want a repeat order, but if they decide to change the type of cap for their new order you may have issues if the original design does not fit on the new cap.
    Sometimes 2 inches is too high for a design if you have more than 1 line of straight lettering or if you have a design that has a long line of small straight lettering on the bottom. This can be a real problem. Your bottom line of lettering may pull up in the center of the cap.
  3. Make sure that the bottom of the design is at least one-half inch up from the seam where the cap front and the brim are sewn together. If you are working on a stiff cap front your letters may distort if you are sewing too close to the bottom of the cap. A lot of this depends on how the cap is made and how stiff it is at the very bottom of the front where it attaches to the brim. When you are hooping your cap, you must make sure that your cap facing is really tight into the lip of the cap framing device. If this does not work you have to either shorten your design to compensate or distort your lettering in the opposite direction. Sometimes just shortening the height of the design and moving it up slightly on the cap front will take care of the problem.
  4. If you are using an embroidery design for a cap that has been created for a left chest, it is not always possible without editing the design to make it embroider properly on the cap. If you have lettering on the bottom of the cap you will have better results if you edit your design so that this lettering will stitch out first. I have found that this works best. Make sure that your lettering is set up to stitch center out. If your lettering is not stitching center out, you will need to re-sequence the lettering.
  5. Always use cap backing when you are hooping your caps, regardless of how heavy or stiff your cap is. This also will help to produce a higher quality embroidery design on your cap. A 3 oz. tearaway cap backing is the best choice.
  6. If you are working with a stiff cap such as a FlexFit cap; I have found that steam pressing the cap first softens up the backing and flattens out the top part of the cap. This makes the cap sit closer and flatter against the needle plate and helps to embroider designs on caps a lot easier. This is especially important when you are embroidering designs on youth sized caps. They are smaller and it is harder to get them flat against the needle plate.
  7. Walk your machine when you first startup. By that I mean when you press the start button, keep your finger right on it and do not let up. This will allow the machine to stitch one stitch at a time and it will walk over that really thick part of the seam. When you just hit the start button in a normal fashion the machine is going at its fast speed. This causes the needle to deflect when it is trying to sew through those thick areas and will break. I am sure that you have seen this. If you walk the machine first, it will start very slow and you will avoid this from happening and this will help you to embroider designs on caps with ease.

I hope that these tips will help you embroider designs on caps with ease and make working with caps more pleasant than it has been in the past for you. Until you learn how to embroider designs on caps with ease, it can be very frustrating. Caps are a real money maker; they can be one of your biggest money makers, so it is to your benefit to learn how to embroider designs on caps with ease.