by The Embroidery Coach | | Embroidery Education
Helping your customer get the best results for their custom design or logo when they request it for embroidery can sometimes be a challenge with the artwork that is being created today by graphics designers. In today’s world of computers and complex artwork programs many customers will have artwork that was created for them that looks great on paper but does not translate into embroidery very well. When you first look at a design, you need to look at it in terms of how is this going to work with thread rather than ink. Many designs need to be simplified in order to work well for embroidery but that same design may work great for screen printing or sublimation instead of embroidery.I want to show you two designs that were sent in to me for digitizing and both of these designs would look great in ink but not in embroidery.
The first design that was sent to me to be digitized was by a customer that was very insistent on having his design embroidered on caps. This design would not work well for caps and I had to tell him that it would not. His design will work for screen printing or sublimation but not for embroidery.
If he wants embroidery, he will have to compromise and have his design recreated in such a way that he will be happy with it and it will look great in embroidery. This design would not work well for 2 reasons. It was created to look like it was on a round surface and that does not always work out great in embroidery on a flat surface. The second reason is all of the dots inside of each letter. If this could be digitized for embroidery, it would be a production nightmare and he would not be happy with the cost of the digitizing or the end result! This design could work out as a color blend, but not with all of those dots. The customer does not always know this and you have to educate them to make them understand. Show them samples of a color blend and let him digest that possibility.
This second design has too many colors blends in the same area. This design has color blends going in different directions in the same letter. The inside of the letter is one type of color blend and then the border of each letter is another color blend. This would not work in embroidery. 
Also the small black lettering has a white border. The small black lettering needs to be enlarged a small amount and the white border will need to be eliminated.
The customer was also expecting that the white stripes and stars in the flag would just be showing through on his white shirts. This would be impossible. This can work for screen printing but not for embroidery. The white stripes would need to be embroidered in order for the red stripes to look clean and the white stars would need to be placed on top of the navy field.
There is certain information that you need to have from your customer upfront when you are working with them to find out exactly what they want and how they are going to be using their design. Their logo or design is very important to them and you need to know what their final expectations are from you.
Here are some basic questions that you need to ask your customers at the beginning of the process.
What type of garments or articles will be embroidered using his design?
It is very important to know this upfront so that the artwork can be created at that time for the different types of articles. This is very important for you and the digitizer to know. The design is created differently for caps than it is for a left chest shirt design, jacket back or even bags.
Do You Anticipate That This Same Design Be Used For Another Type Of Garment?
It is best to know this up front. The digitizer can create the original design in such a manner that it can be used for more than one type of garment when they first create it.
What type and quality of fabric in the garment will your customer be purchasing?
A design that is created for a woven shirt may not run well on a pique shirt. The designs will require different settings for the different types and quality of the fabric. If you have a design created for a t-shirt it may not run well on a pique shirt because of the rough texture of the pique. There are also different weights of fabrics, so all of these factors need to be taken into consideration when the design is being digitized. The moisture-wicking fabrics need special settings so the digitizer will need to know this at the onset.
How many sizes of this design will be needed?
If your customer has a thought that he may want this design in a larger size for future use, you need to let the digitizer know this. He may be able to create the artwork at that time for both and will save a little on the cost in the future.
Is the artwork camera ready?
An idea of a design on a napkin is not camera ready artwork. If the artwork has not been created in a format that the digitizer can load into his or her computer and start creating the design immediately, then new artwork must be created and there should be an extra charge for this. The best form is a vector file such as a .cdr or a .ai file but this is not always possible for the customer to produce.
A .jpg or a .pdf will also work for digitizing their design. It is very important to get the design in camera-ready artwork from the customer in order to deliver exactly what the customer is expecting. If you do not have camera ready artwork, have the artwork created and then approved by the customer before proceeding with his digitizing order.
How many colors and what exact colors will the design have?
Try to get this established up front, not only how many colors, but where each color will be in the design. This will save you time later on when you are working with the design to create your sew out.
How many different colors of garments will the customer be ordering?
The colors in the original design may need to be adjusted for the different colors of garments. It is best to get this established in the beginning if at all possible. The customer will not even think about this but it is important for you to look at the design in such a manner that you can suggest adjustments to the design so that it will work with all color combinations. He may not order many color combinations the first time, but maybe back for a reorder that will require these adjustments. It is best to anticipate this at the beginning.
Helping your customer get the best results for their custom design is very important and the more that you educate your customer, the more he will appreciate it and have confidence in you. If you will obtain all of this information upfront from the customer, both you and the customer will be happier with the end result. You will save a lot of time by not having to ask questions as you are trying to get his perfect sew out done and he will see you as an expert embroiderer.
by The Embroidery Coach | | Embroidery Business Marketing
Embroidery on the tongue of sneakers is a new craze that is happening because someone showed a pair on the “Today Show” a couple of months ago. I received a phone call asking me if I could embroider the tongue of the sneakers. Well, my response was, if someone else did it, I could certainly do it also. Just bring them in and I will do it.
The customer brought her sneakers in, asked if we could do embroidery on the tongue of sneakers and of course, we said yes! She picked out her monogram and we embroidered them and she was extremely happy with the finished results. They were going to be a Christmas present for her teenage daughter.
We do not use clamping systems or any other type of devices in our shop. We only use hoops, the same hoops that we use for every other project. When I first started embroidery, none of those items even existed but I had to embroider any type of item that everyone is embroidering today. It was no different than it is today, just the fact that we had to learn to accomplish it with the tools that we had. All of the other types of hooping devices came along many years after I started.
I am not saying do not purchase any of the new types of hooping devices, I am just saying, you can embroider these types of projects with your current tools. I am going to show you how we accomplished this using our normal hoops, backing and applique glue and masking tape. Those have always been the tools that I used for every project that I have done whether they were hoopable or not.
I am going to go through the step by step process of embroidery on the tongue of sneakers.
I do not have a picture of each process but you will be able to see exactly how we did this using our normal hoops, backing, glue and masking tape.
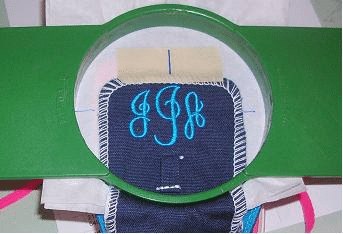
Step 1 – Measure the distance from the top of the tongue to the spot where the lace is going to go through the tongue. Leave about one-fourth of an inch at the top and at the bottom of where the monogram will be.
Step 2 – Create the monogram in your software to match the area of where you are going to be embroidering your monogram.
Step 3 – Print out the monogram, cut it out and lay it on the area to make sure that it will fit and is exactly as you want it.
Step 4 – Take 2 layers of 1.5 oz crisp tearaway backing. Mark a center line on the backing both horizontally and vertically. Spray the backing with applique glue. Position the tongue onto the top layer of backing and tape the top of the tongue in place using masking tape. Do not try to use scotch tape, it will not hold it.
Step 5 – Place the 2 layers of backing with the taped tongue onto the bottom part of the hoop and add the top part
of the hoop. You will need to make sure that you have the lines marked on the backing with the lines marked on your hoop. It will need to be perfectly straight.
This particular picture is showing you how it is hooped even though the embroidery is finished. You can see how straight it is, how the top is tapes and the marks on the backing.
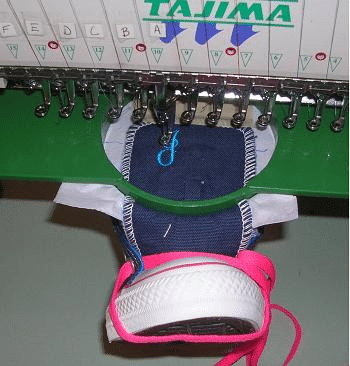
Step 6 – Place your hooped sneaker tongue into the embroidery machine and line it up so that your design starts in the center. Press Start. In this picture, you can see how it was hanging from the hoop in the embroidery machine.
 Step 7 – When they are finished, you remove the sneaker tongue from the backing and tape. If you have placed marks on the tongue, remove the marks and you are finished.
Embroidery on the tongue of sneakers is something that any embroiderer can do. Give it a try, you will find that it is not hard at all and is a fun project!
To learn more information about how to embroider on all types of fabrics and garments, so to The Embroidery Training Resource Center.

by The Embroidery Coach | | Embroidery Business Marketing
Are You Stuck Trying To Figure Out What To Charge Your Customers For Their Embroidery?
Pricing your embroidery is probably the hardest task that you have to do in your whole business and getting your embroidery price list done in a way that you can make a profit can seem like a huge job that has no beginning or end! You wait on your customers, show them your samples and then they place their order. As they are placing their order, they want to know what the price is going to be. Now you are panicking! “You have to come up with an answer and they are standing right here in front of me waiting for that answer. Now what do you do?”
So many embroiderers at this point will just pull an answer right out of the air with no idea as to whether it is right or not. They are afraid if they throw out too high of a number, the person will just walk out and then they will not have the order at all. It is better to price low and get the job than to price high and take a chance on not getting the job, so they think!! Does that sound familiar?
Get Your Embroidery Pricing Done Now 5-hour Workshop
This 5-hour Pricing Workshop will take place July 21st from 10am-3pm Eastern Time. This virtual workshop is going to be hands on and interactive right from your own computer! You are going to be able to ask me specific questions about your business and I will answer them! This is going to be your chance to finally get your pricing structure done correctly and be able to walk away with a good embroidery price list.
Are you wondering if this Embroidery Pricing Program Workshop is for you?
Are you just starting out and want to create a price list that is going to make a profit?
Are you tired of trying to figure out what to charge your customers!
Are you struggling? Trying to get it all together and just DO NOT KNOW where to start?
Are unsure of your price list and want to check to see if you are charging correctly?
Do you have many pricing levels and DO NOT KNOW how to charge for the different levels?
If you said yes to any of those questions, then YES this is for YOU!
This is for the embroiderer that is just starting out and wants to create a price list that is going to make a profit!
This is for ALL EMBROIDERERS that want to make money, and please do whatever you can to be a part of our “Get Your Pricing Done Now” workshop on July 21st.
This is going to be your chance to FINALLY get your pricing structure done correctly and be able to walk away with a good price list. And make a profit in your business! If you have not purchased the pricing program, it is included in the price of the package, however, if you have purchased it, you can still purchase the workshop alone. You will see on at the bottom of the video page there are 2 links.
After purchase, you will be receiving instructions as to what to do to prepare for it. I want you to get the most from this training possible. Click on the link below to the information page and access to purchasing the Workshop!
by The Embroidery Coach | | Embroidery Education, Embroidery Production
Searching for the right Embroidery Design Placement Chart can be very confusing and frustrating. There are many charts available for many different types of garments and linens, but most of them are not specific and it is up to you to create that perfect placement chart that will work for 99 percent of your items.
Your customer is depending on you to know the proper placement and when he or she receives it and the design looks off, they are extremely disappointed.
The right placement is important in the final quality of your product and the presentation of that product to your customer.
The placement of a monogram or an embroidery design on a garment is subject to many variables. There was a time when tradition was very important, but in today’s world that is not always a big factor. There are basics that really need to be followed, but for the most part, placements are all over the place.
Your customer’s preference needs to be taken into consideration, but for the most part, the customer is trusting in you to make that right decision because you are the professional with the experience.
Many times, we have to figure it out by the type of garments, the lines on the garment, the size of the garment and the basic construction of it, but it is much easier when you have a basic guide that you can follow.
Here are some of the variables that you need to watch out for.
- Working with Stripes – If there is a stripe you must make sure that you hoop according to the stripe even if it appears to be slightly crooked.
- Are there any diagonal, horizontal or vertical seams in the area that the logo would normally be placed?
- Are there any inside zippers?
- Are there any inside pockets?
- Is there an access zipper inside?
- Is there a removable lining?
- Is the lining larger and wants to bunch up?
- Is there an existing embroidery that must be considered?
Attention to all of the details is extremely important when you are placing your logo, lettering or monogram on either the left or right chest of any garment. Having a good basic embroidery design placement chart is very important if you want to be consistent in all of your design placements!
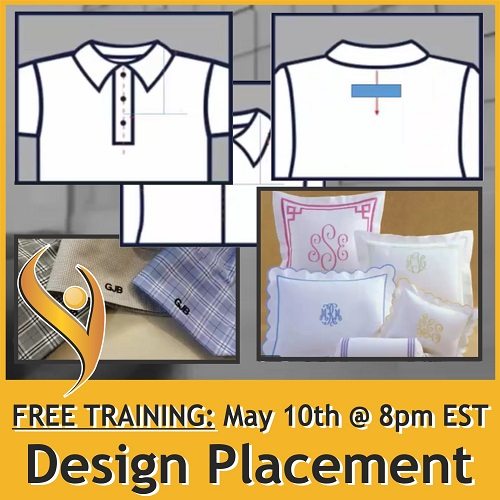
To learn the basics of Embroidery Design Placement sign up for our Free Monthly Embroidery training on May 10th. Click Here to get signed up. Monthly Training
by The Embroidery Coach | | Embroidery Business Marketing, Embroidery Pricing
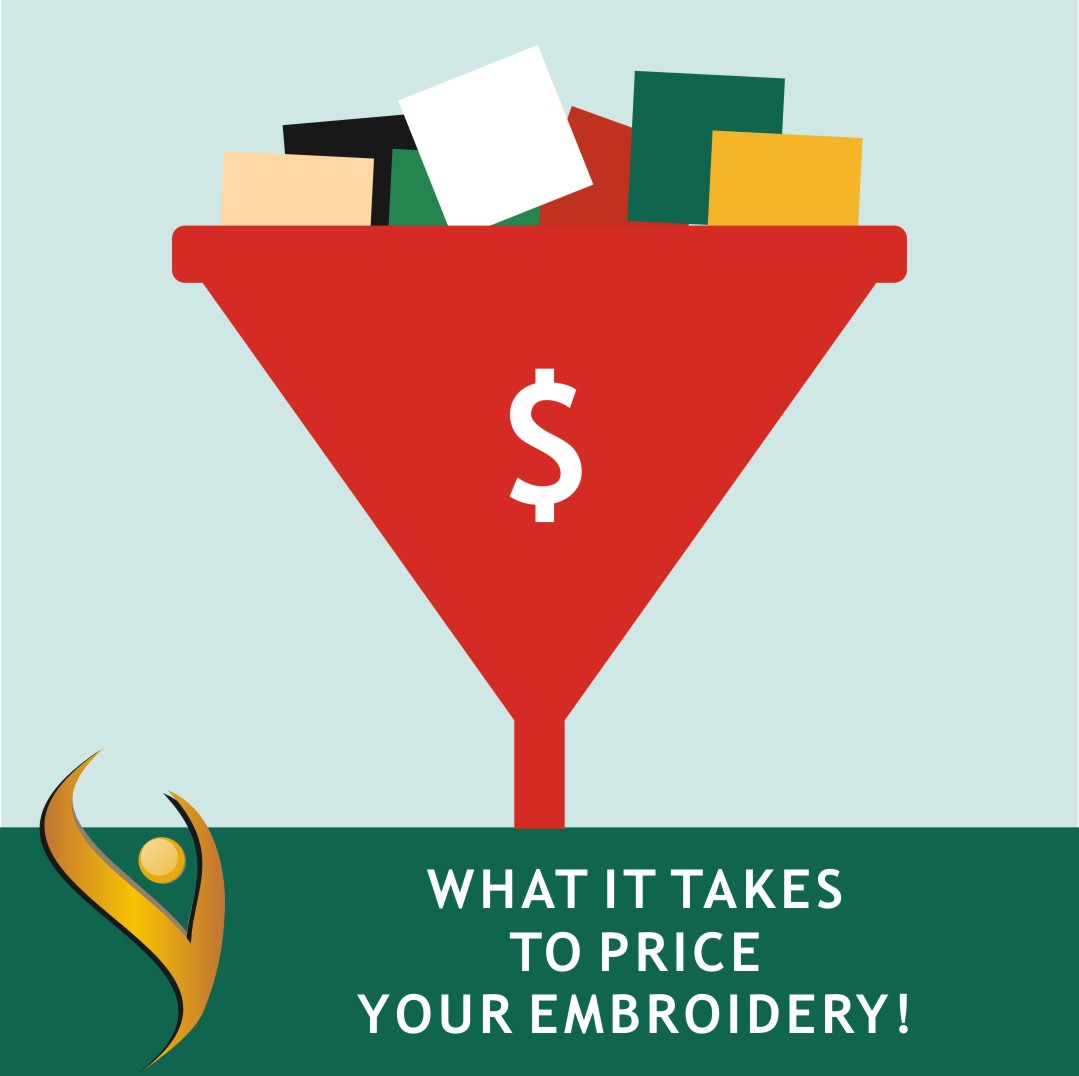
Do you know what it takes to price embroidery correctly so YOU can make a good profit?
Pricing is one of the main concerns that most embroiderers have when they are first starting out in business and even after they have been in business for a while; they are still trying to figure out how to price their embroidery. I have found that most embroiderers start out by obtaining the price list from anther shop and this is what they use to start charging their customers. They really do not understand what it takes to price embroidery.
They soon wonder why they are not making any money or have any money left over at the end of the month when the other shop is still operating at what appears to be very smoothly and maybe even profitably!
You may have heard my story of how I almost lost my embroidery business because I was pricing totally wrong. When you are first starting your embroidery business, you really do not know where to begin when it comes to the pricing area of your business. You start by getting the price list of your competition and many times try to stay one step ahead of them by lowering your prices just a bit or else charging exactly what they are charging; thinking that this is the way to go.
That is exactly what I did when I first started and kept this up for several years! I felt so pressured because many times the competition was charging less than I was and I thought that I had to keep my prices low so that I could get the work!
After 15 years of struggling I finally sat down with my accountant told him that I was sick and tired of struggling and he told me that I needed to raise my prices or else get out of business! I did not want to get out of business because I loved embroidery but I was scared to death to raise my prices. I just knew that I would lose all of my customers!
But really, what was the difference? Either I had to try this to see if it would work or I would just quit because I did not want to continue to work night and day any more for no profits! Actually, I was in the hole! There was no take home pay for me, it was just work, work, work day after day! I had the mindset that it was all in volume and that eventually when the numbers were large enough it would all even out and I would finally be making some money.
That was the wrong mindset and I finally discovered that the volume theory with the amount of machine that I had was not working. I know that many other embroiderers find themselves in the same trap and they really have no idea how to get out of that hole!
Most embroiderers start their embroidery businesses, because they love what they do and they decide that they can earn some money with it and they soon learn that there is a lot more to it than just getting jobs and getting those orders out the door!
There is so much more that goes into figuring your pricing than just stitch count and that is what the majority of embroiderers are charging for. When your machine is not running, you are not making any money, how can stitch count be your only factor? It isn’t. You have color changes, stops and starts, the time it takes to put the garment into the machine and take it out along with other factors.
Who is paying to hoop it, who is paying to trim it, who pays for the packaging of the finished product? Most of the time it is the embroiderer and not the customer that chokes on all of those charges. This is not the way that it is supposed to be!
However, what do they do? Where do you start? In this training I am going to give you the steps that it takes to price out your embroidery correctly and what you need to do to run a profitable embroidery business.
No. 1 Know Your Break Even Point!
You must know what your break even point is. Do you know what a break even point is? That is the sum total of all of your expenses that you have that costs to run your business each & every month. What is that figure and how do you find out? What is included in this figure?
No. 2 Know All Of Your Processes!
You must know what all of the processes are that are performed with each and every order. Each step in your business has a process and that process has a price attached to it. The bottom line is, it costs money to run your business! It costs money to wait on a customer! It costs money to plan out their order! It costs money to create their product! It costs money to stand there and chat with your customer when they pick up their order. You need to know what each one of those steps and processes is costing you.
No. 3 Time All Of You Processes!
Time out all of your processes. Start timing each process as you are performing it when starting and completing a job.How much time are you spending:
- Taking an order
- Ordering your products
- Getting your job ready for production
- Creating the Invoice
- Talking to the customer when they pick up their order.
Each and every one of these tasks plus many more need to be timed out and has a cost price attached to them. When you have that done, you will be able to see exactly what the job is costing you. Too many people make the mistake of pricing by stitch count alone not really realizing that they need to be adding all of these other steps onto the price as well.
This is what it takes to price embroidery correctly! Being aware of all of your costs and watching your numbers are extremely important and the bottom line of what it takes!
I would love to start a movement for embroiderers to stop working for nothing and start pricing their work for a price that is worthy of them. We are highly skilled professionals, not unskilled labor, but that is how most embroiderers charge. This is very disheartening!
It is time to stand up and start charging what you should charge like the professional that you are!
For more information about What It Takes To Price Embroidery Correctly For A Profit click on the link below!