by The Embroidery Coach | | Embroidery Tip
This embroidery tip is all about quoting embroidery designs for your customer while they wait? Do you ever have a customer that brings in designs that they want you to reproduce? Of course, you do. Do they want a price while they wait? Sure they do. Have you ever wondered how you can be quoting embroidery designs for your customer without having to go to your digitizer to find out how many stitches there would be in that design?
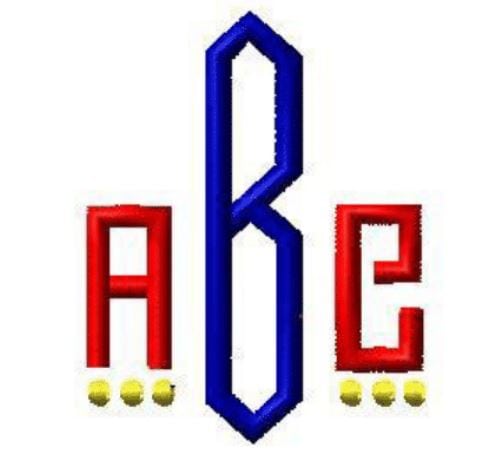
I came up with a system that is fairly simple for quoting embroidery designs and it works great for me and has worked for the past 20 years. I started creating my system by typing in letters at different sizes into my digitizing system to find out what the stitch count would be. Of course, each style is a little bit different but for the most part, it worked. I averaged out the different letters and here is my result.
- 1/4″ letter = 150 stitches
- 1/2″ letter = 200 stitches
- 3/4″ letter = 350 stitches
- 1″ letter = 500 stitches
- 1 1/4″ letter = 600 stitches
These are the sizes that I have always used the most. If you add up all of the letters in the design by the size and multiply them by the number of stitches, you will have the stitch count for the lettering.
To figure the other areas in a design, there are approximately 1600 fill stitches in a square inch. These of course vary with the pattern and length of your stitch, but this is an average.
Satin borders are approximately 175 stitches per inch. This again is an average, it depends on the density of your stitch. You must also remember to add a little extra for underlay stitching but this will at least give you a starting point and it will make it much easier to look at a design and give a quick quote while the customer waits!
Do you have a method for quoting embroidery designs that you have used that has worked great for you? I would love to hear about it! You can learn more about quoting embroidery designs at the Embroidery Business Academy.
Joyce Jagger
The Embroidery Coach
by The Embroidery Coach | | Embroidery Tip
When you change the needles in your embroidery machine there are some points that you want to remember:
- After you remove your needle from the machine you want to put in a plastic container with a lid, don’t ever just throw it into the garbage.
- Be very careful that you do not touch the needle on any part of the surface of your presser foot. As you are putting it into the machine, hold it with needle nose pliers and rest the index finger of your opposite hand against the pliers to smoothly place it down through the hole in the presser foot and then up into the hole where the needle goes without touching any of the surface. If you do happen to touch any surface of the presser foot, throw your needle away. You have already damaged the tip. The tip damages very easily and you want to avoid this.
- After you change your needle make a notation about your needle on your needle replacement sheet. You always want to know where your different needles are in the machine and when you changed them. Record the size & type of needle, which needle bar it went into and why you changed it.
Keeping good records of your needle changes will help when it comes time to call a tech with a problem.
I hope that you will find this tip helpful. If so, please respond below this video and let me know. I have a free ebook for you. Just go to MasterEmbroiderySkills.com
Embroidery Business Mastery, “The 3 Skills For Every Successful Embroidery Business”. Go pick it up today!
by The Embroidery Coach | | Embroidery Tip
Always give your customer a completed embroidery design sew out sample to get their OK and have them sign off on their design. Creating embroidery design sew out samples is a very important step in your embroidery production process. You need to be able to show your customer a completed sample of how his embroidery will look before you actually embroider the design onto the customers finished garments.
I have discovered that most embroiderers create the embroidery design sew out samples on squares of backing fabric and give this to the customer for their approval. You really do not know what the actual design will look like on the finished products. The settings for the various types of fabrics need to be adjustment correctly for the best results on that fabric.
Having the exact same fabric is not always possible but there are fabrics that work as great substitutes. A t-shirt fabric works for a jersey knit placket shirt, the backside of a sweatshirt is a good substitute for a light weight fleece fabric, and an old worn out sheet is good replacement for a dress shirt or a handkerchief. If you use your imagination you can come up with a lot of close matches that will definitely work when you are creating your embroidery design sew out samples.
A great source for these type of fabrics are old garments that your family has discarded. I cut up various sized squares from old or unwanted garments and store them in plastic boxed that I have labeled: T-shirt fabric, Sweatshirt fabric, Wind shirt fabric, Terry cloth, Dress shirt fabric, and Heavy woven fabrics. When it is time for a new sew out sample these fabric squares come in very handy.
Another good source I found for inexpensive garments was at Goodwill or The Salvation Army stores. I needed some leather for a sew out sample and did not have any on hand. I found a jacket at the Goodwill store that had the lining ripped out of it. It was not selling so I was able to pick it up for $5.00. I have created a lot of sew outs from the one jacket.
You also want to choose a color of fabric that is closest to what the customer will be using. If this is not possible use a light color or neutral fabric for garments that will be a light color and a dark colored fabric for garments that will be a dark color. Create your embroidery design sew out sample in the correct colors that your customer will be using.
Giving your customer a completed embroidery design sew out sample on the correct type of cloth and in the correct colors shows him or her exactly how the embroidery will appear on the finished garments and it instills within them a level of confidence that you as a professional know exactly what you are doing.
Click Here to sign up for more embroidery tips! You will be sent a new embroidery tip each week!0
Joyce Jagger
The Embroidery Coach
by The Embroidery Coach | | Embroidery Tip
How to repair an embroidery design that sews out of registration is a constant problem that most embroiderers face and are very often stuck .When your Embroidery design on your finished garments do not look as good as your design sew out, this creates a huge problem. Sometimes it can be solved and sometimes the garments are totally wasted!
The problem with this design was created by an embroidery machine operator and it could have been totally avoided. I have always been adamant about making sure that the design sew out was done on the same type of fabric that you are going to be using for your finished garments. This is very important and will pay off in big dividends in both quality of embroidery and time.
As I am working with an embroidery company trying to help reorganized their production and get it up to speed, an issue came up that is very common with many embroiderers, especially new or inexperienced embroiderers.
One of the embroidery machine operators sewed out a design they had received back from the digitizer. She created her sew out to make sure that the design was OK and ready for production. She then embroidered her 6 knit shirts for the customer on an 8 head machine. When she finished them, they were way off registration and it caused the material in the shirt to look stretched around the embroidery.
What caused this Design Registration to be so far off?
She called me over to look at the problem and wanted to know why it happened. She also wanted to know what she could have done to avoid this and how to get this issue solved. The shirts were quite expensive and they are totally unacceptable the way that they are.
I was shocked as to how bad it looked when I first saw it. I quizzed her about her process, what fabric she used for the sew out, what thread she used, how did she have it hooped and how her tensions were set. She created her sew out on 2 layers of firm cutaway backing.
Her sew out was NOT done on the right type of fabric; that was her main problem! You always use the same type of fabric, or very similar, that your finished garments are going to be. She also used 2 layers of a heavy cutaway backing, and the hoops were not tight enough. The backing was much too heavy for the shirt or design. She would have been better off with a lighter weight backing such as a 2 oz cutaway or the No Show cutaway backing. The No Show backing is a mesh backing that holds up very well with a lot of stitches and yet it keeps the garment soft and pliable. She was correct in using a topping on the top of the garment.
Now the question is, how do you solve this problem?
It is very important for every embroiderer to know how to repair an embroidery design. Here is a simple way to make your repair.
- First of all, do not remove the garment from the hoop or the topping from the top of the embroidery. Lay the garment face down over a firm surface and use a tool called “Peggy‚’s Stitch Eraser” and remove the stitching from the backside of the garment. I use a large candle jar, one with a smooth bottom, turned upside down. You must be very careful that you do not cut any holes into the fabric.
- After you have removed all the stitching and thoroughly cleaned up all of the threads, it is time to embroider the design again.
- This time you must increase the size of your design by 2 or 3 percent. This will be large enough to cover everything that you removed.
- You must make sure that you do not loosen the hoop as you are removing the stitches. This is very important. If you do, you will need to tighten the hooped area before you begin sewing out the design, and it makes it more difficult to line it up.
Repair your Embroidery on a Single Head Embroidery Machine!
- You already have it hooped so you are not going to re-hoop your garment to add new backing.
- Load the hooped garment back into the machine and lay new backing down under the hoop. For this you will need to use 1 head only because you are not going to be able to line up all 6 shirts to sew out perfectly on the multi-head machine when you are repairing a design like this.
- Print out a new design sheet of the larger sized design, cut it out following around the edge of the design and lay it inside the hoop covering the entire area that had the embroidery removed. Make sure that you have the center starting point of the design marked on the design print.
- Line up the needle with the center starting point.
- Remove the cut out print, lay down a piece of topping and tape it into place. Now you are ready to re-embroider the design.
This repair method did solve the problem with this order but this embroidery machine operator will make sure that she uses the correct fabric for her sew out the next time and will also use the correct backing. This is a problem that could have been totally avoided if she had been instructed properly, however, every embroiderer need to know how to repair an embroidery design.

by The Embroidery Coach | | Embroidery Tip
Always sew out your embroidery design out on a scrap piece of fabric that is very much like the one that you are going to be sewing on for your embroidery order. Make sure that you have it hooped properly, taut in the hoop with no flagging. Use the proper type and amount of backing for the design and fabric. Do not stretch your fabric and make sure that you are sewing on the grain of the fabric and not against the grain
When you are sewing out a design for the first time, you need to take the time to watch it while it is sewing. Print out your worksheet from your design software and use it to follow along as you sew out the design. Slow your machine down very slow if you start having issues. This way you follow it stitch by stitch and you will see the problems as you are sewing it out.
Make notes on your worksheet about the design as you sew out your embroidery design.
- Are any locks or tie ends missing?
- Is it sewing more than one stitch in the same location?
- Where exactly did the thread break?
- Did the thread fray or break clean?
- Is the lettering easy to read?
- Is the inside of the letters open?
- Do all of the letters line up on the same line?
- Does the design run trouble free?
- Are there any unnecessary trims?
- Is the pathing correct so that it runs smoothly without jumps?
- Are there are any holes in the fabric around the lettering and inside of the centers of the lettering?
- Do you have good thread coverage?
- Would this same design work with a dark contrast of fabric and thread?
If the issues do involve the design, you can then talk intelligently to the digitizer and tell him or her how the design is reacting and what you see happening. This makes it easier for the digitizer to solve the issue if, in fact, it is a design problem. The main thing is that if you always sew out your embroidery design on the same like find fabric, you will know exactly what it looks like and what adjustments need to be made.
For information on embroidery training or embroidery business training, go to EmbroideryBusinessAcademy.com
by The Embroidery Coach | | Embroidery Production, Embroidery Tip
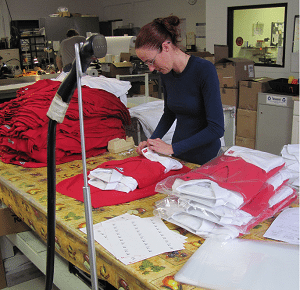
The finishing of your garments after you have embroidered them is very important! These important details in the embroidery finishing process can help to raise your level of customer service. There is far more to finishing than just removing the backing and folding up the garment. There are many details in your Embroidery Finishing Process that if you pay close attention to; will increase the value of your business.
When you are going through the finishing process there are many details and problems that you need to look out for.
- Thread Tails
- Missing Stitches
- Stray Threads
- Loops in the Embroidery Design
- Is Embroidery Straight?
- Garment Stains
- Damages
- Buttons Missing
- Zippers Not Working
- Bobbin Pull Up
Thread Tails: Trim off as closely to the garment as possible but be careful not to cut off any lock knots.
Missing Stitches: If you find some stitches that have been skipped and are missing, they will need to be repaired. The easiest way to do this is to thread a hand sewing needle with a double strand of matching embroidery thread and do a satin stitch by hand to fill in the missing stitches.
Stray Threads: Thread that sometimes get caught during the embroidery process trail across the embroidery. Trim as closely to stitching as possible being careful not to cut off any lock knots. Gently remove with tweezers.
Thread Loops: If you see thread loops that appear in the same direction as the stitching – DO NOT TRIM LOOP! Use your fingernail to scratch loop to backside of garment. Use ONE DROP of Fraycheck on back of stitching where loop has been scratched back. Do Not Allow Fraycheck to get on garment! ALWAYS USE FRAYCHECK ON BACK OF GARMENT-NEVER ON THE FRONT OF THE GARMENT!
If thread loops in a different direction than the stitching, it is usually safe to trim. Trim as closely as possible to stitching.
Crooked Logo or Embroidery: If the embroidery appears slightly crooked, lay the garment flat on the trimming table. Steam embroidery area. While embroidery is warm, lay the palm of your hand flat on top of embroidery and gently twist or turn your hand in the opposite direction that the embroidery is running. Do this a couple of times. Allow garment to dry and check embroidery again. If embroidery is not straight, repeat the process.
Spots/Stains on Garments: There are various methods for spot removal depending on the type of material and type of spot. Most spots can be removed with a drop a dish soap and water. If this does not work, once the garment is dry, you can spray the area with acetone. You will need a professional acetone spot cleaner or sprayer for this application.
Do not use the acetone on fleece garments or Wind jackets, garments that may bleed or near any type of trim that may bleed onto garment. You will need to experiment with different fabrics and keep notes on what worked out well using the acetone and which ones did not.
Damaged Garments: If any garment has been damaged during the embroidery or hooping process it must be removed. Do not try to pass a garment with any damage on it. The customer will be very angry. Bring it to the attention of the customer and let them decide what he or she wants to do. I will either credit the customer for the garment or replace it, but I leave that decision up to the customer.
Buttons Missing: Many times buttons can be replaced if they are missing. If it is a garment that buttons down the entire front, sometimes there is an extra button at the bottom. If it is a branded button that cannot be replaced, let the customer know about it and let him decide what to do. Most of the time if is not the fault of the embroiderer, but it still needs to be brought to the customer's attention.
Zipper Not Working: This is an issue that should have been discovered when the garment was checked in. If not, again bring this to the attention of your customer. If you embroidered the garment and the zipper was broken, you are responsible for that. The manufacturer will usually not replace the garment once it is embroidered even though the zipper was not working when you received it.
Bobbin Pull Up: There will sometimes be bobbin thread noticeable throughout darker stitching in some logos. These stitches will need to be colored with a fine tipped permanent marker the exact shade of color as your thread. This is a very tricky process and again you need to experiment with this until you get the method perfect. It can be done. Do not touch any surrounding areas with this marker. Do not try to cover up a large area, that will not work! This is just for a small spot here and there on bobbin thread showing through on the top stitching.
Make sure all garments are buttoned and zipped before folding and packaging. Paying close attention to these important details in the embroidery finishing process will make a huge difference in your presentation and will show your customers that you are very interested in their business. This will definitely raise your level of customer service!